


I have already written lots about how to use Procreate to work from photos for quilt design…but it can also be a terrific tool if you are looking at a new fabric collection and deciding how you might use it! The key tools we’ll use today are “reference layer” and “clipping mask”…sounds very complicated but once you get the hang of it, actually very easy.
First step – take a screen shot of the fabric collection from the company’s website and save it as a photo…here, Windham Fabrics’ “Dew Drop” collection:

Oooh! Now, to make digital “swatches” of colors, take a screen shot of THIS photo and edit it down to only one fabric:

You might want to do this with each color you’d like to work with before you proceed with Procreate.
OK, now on to Procreate…import this block of ‘fabric’ into your piece as Layer 1:

Now, open Layer 2, and copy/paste the shape you would like to assign to this color. Note, the shape must be filled in! If you try to do this with a line drawing, all it will clip is…yup, a line drawing.
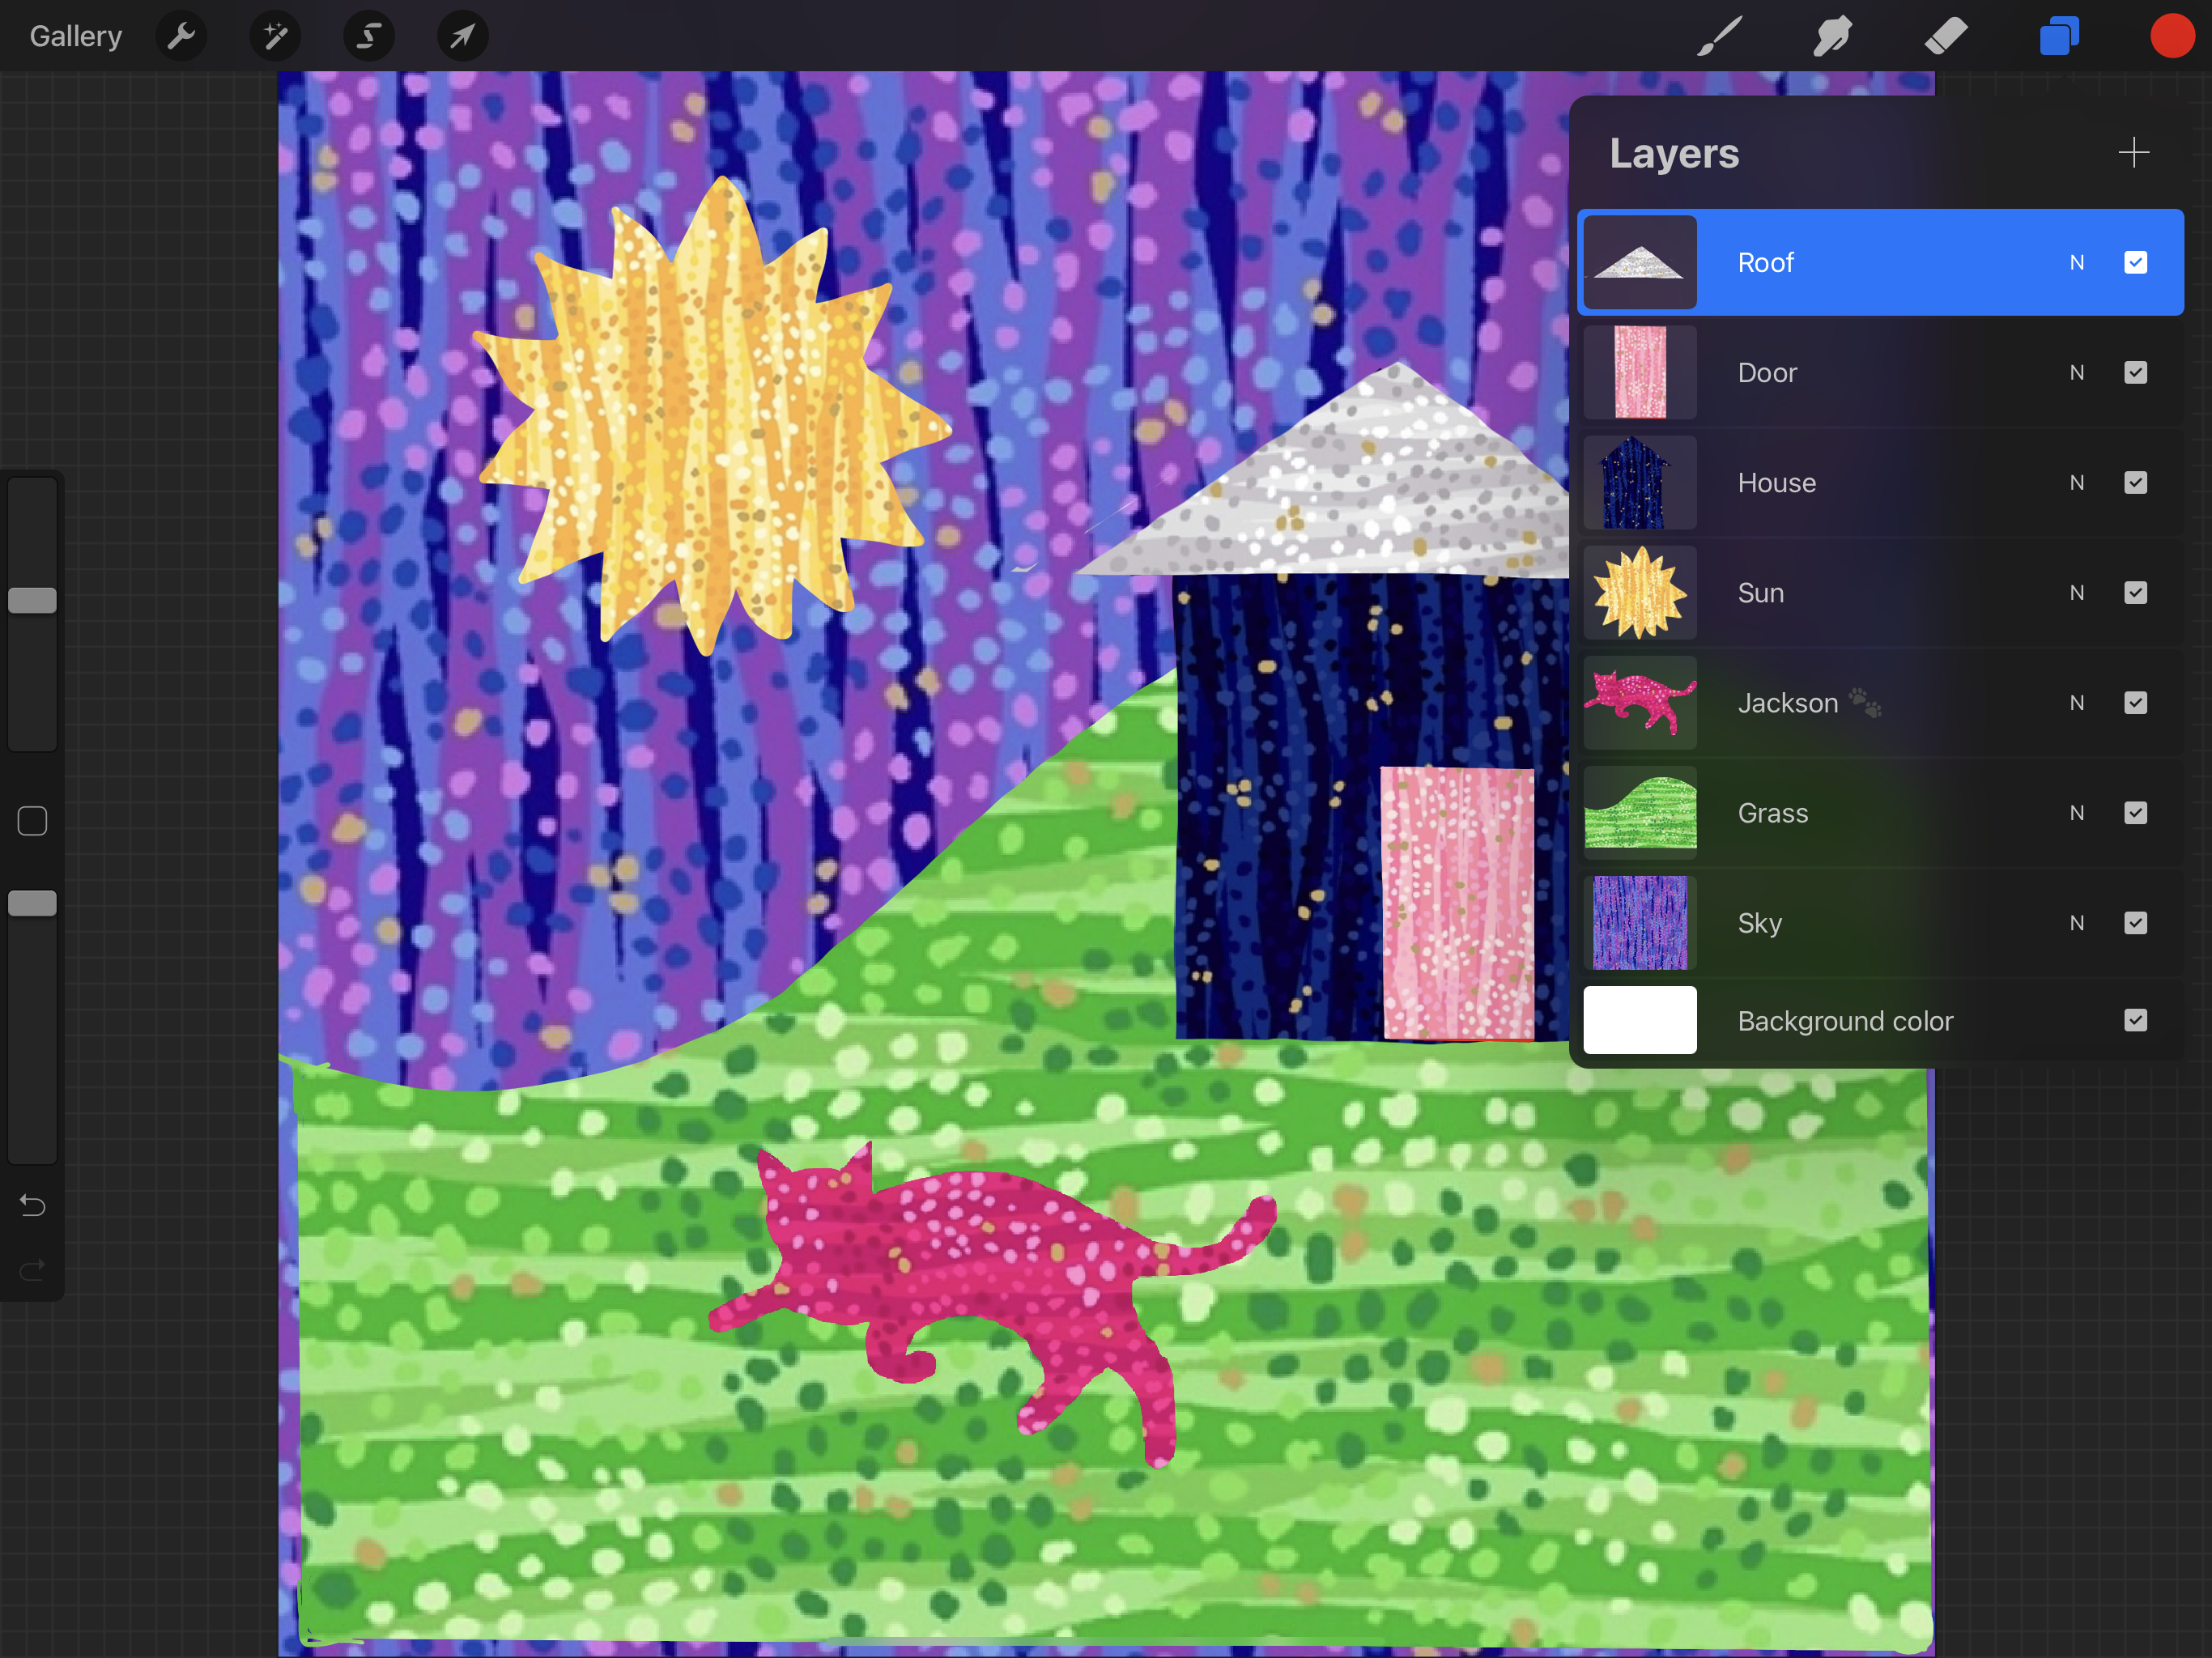
I always begin with Jackson 😉 so he was first…

OK, now…we’ll assign “reference layer” to one layer, and “clipping mask” to the other – I find that the order is NOT intuitive so I keep a cheat sheet nearby at all times! REFERENCE LAYER = YOUR SHAPE…CLIPPING MASK = YOUR FABRIC SWATCH.
Here is the chart I recommend you keep handy:

It’s really really important to de-select “reference layer” before you import more fabric swatches and shapes…as I discovered. All sorts of odd things that do not appear anywhere in the handbook 😆. By de-selecting, your pink cat (or whatever it is) becomes a simple object you can move around without disturbing other functions.
Now you are ready to import your next fabric “swatch”…remember that you can move it to take advantage of vertical/horizontal patterns for your design! This seems like an awful pain to get to that one pink cat…I can hear you thinking, wouldn’t it be easier to print out on paper and cut? 😉…but I promise, once you get the hang of this reference layer/clipping mask process, it’s really fast and fun. Try it with a soon-to-be-released fabric collection you’ve been eyeing and you’ll be all set to cut and stitch as soon as it comes into your quilt shop!
Here’s a view of one with several elements done:

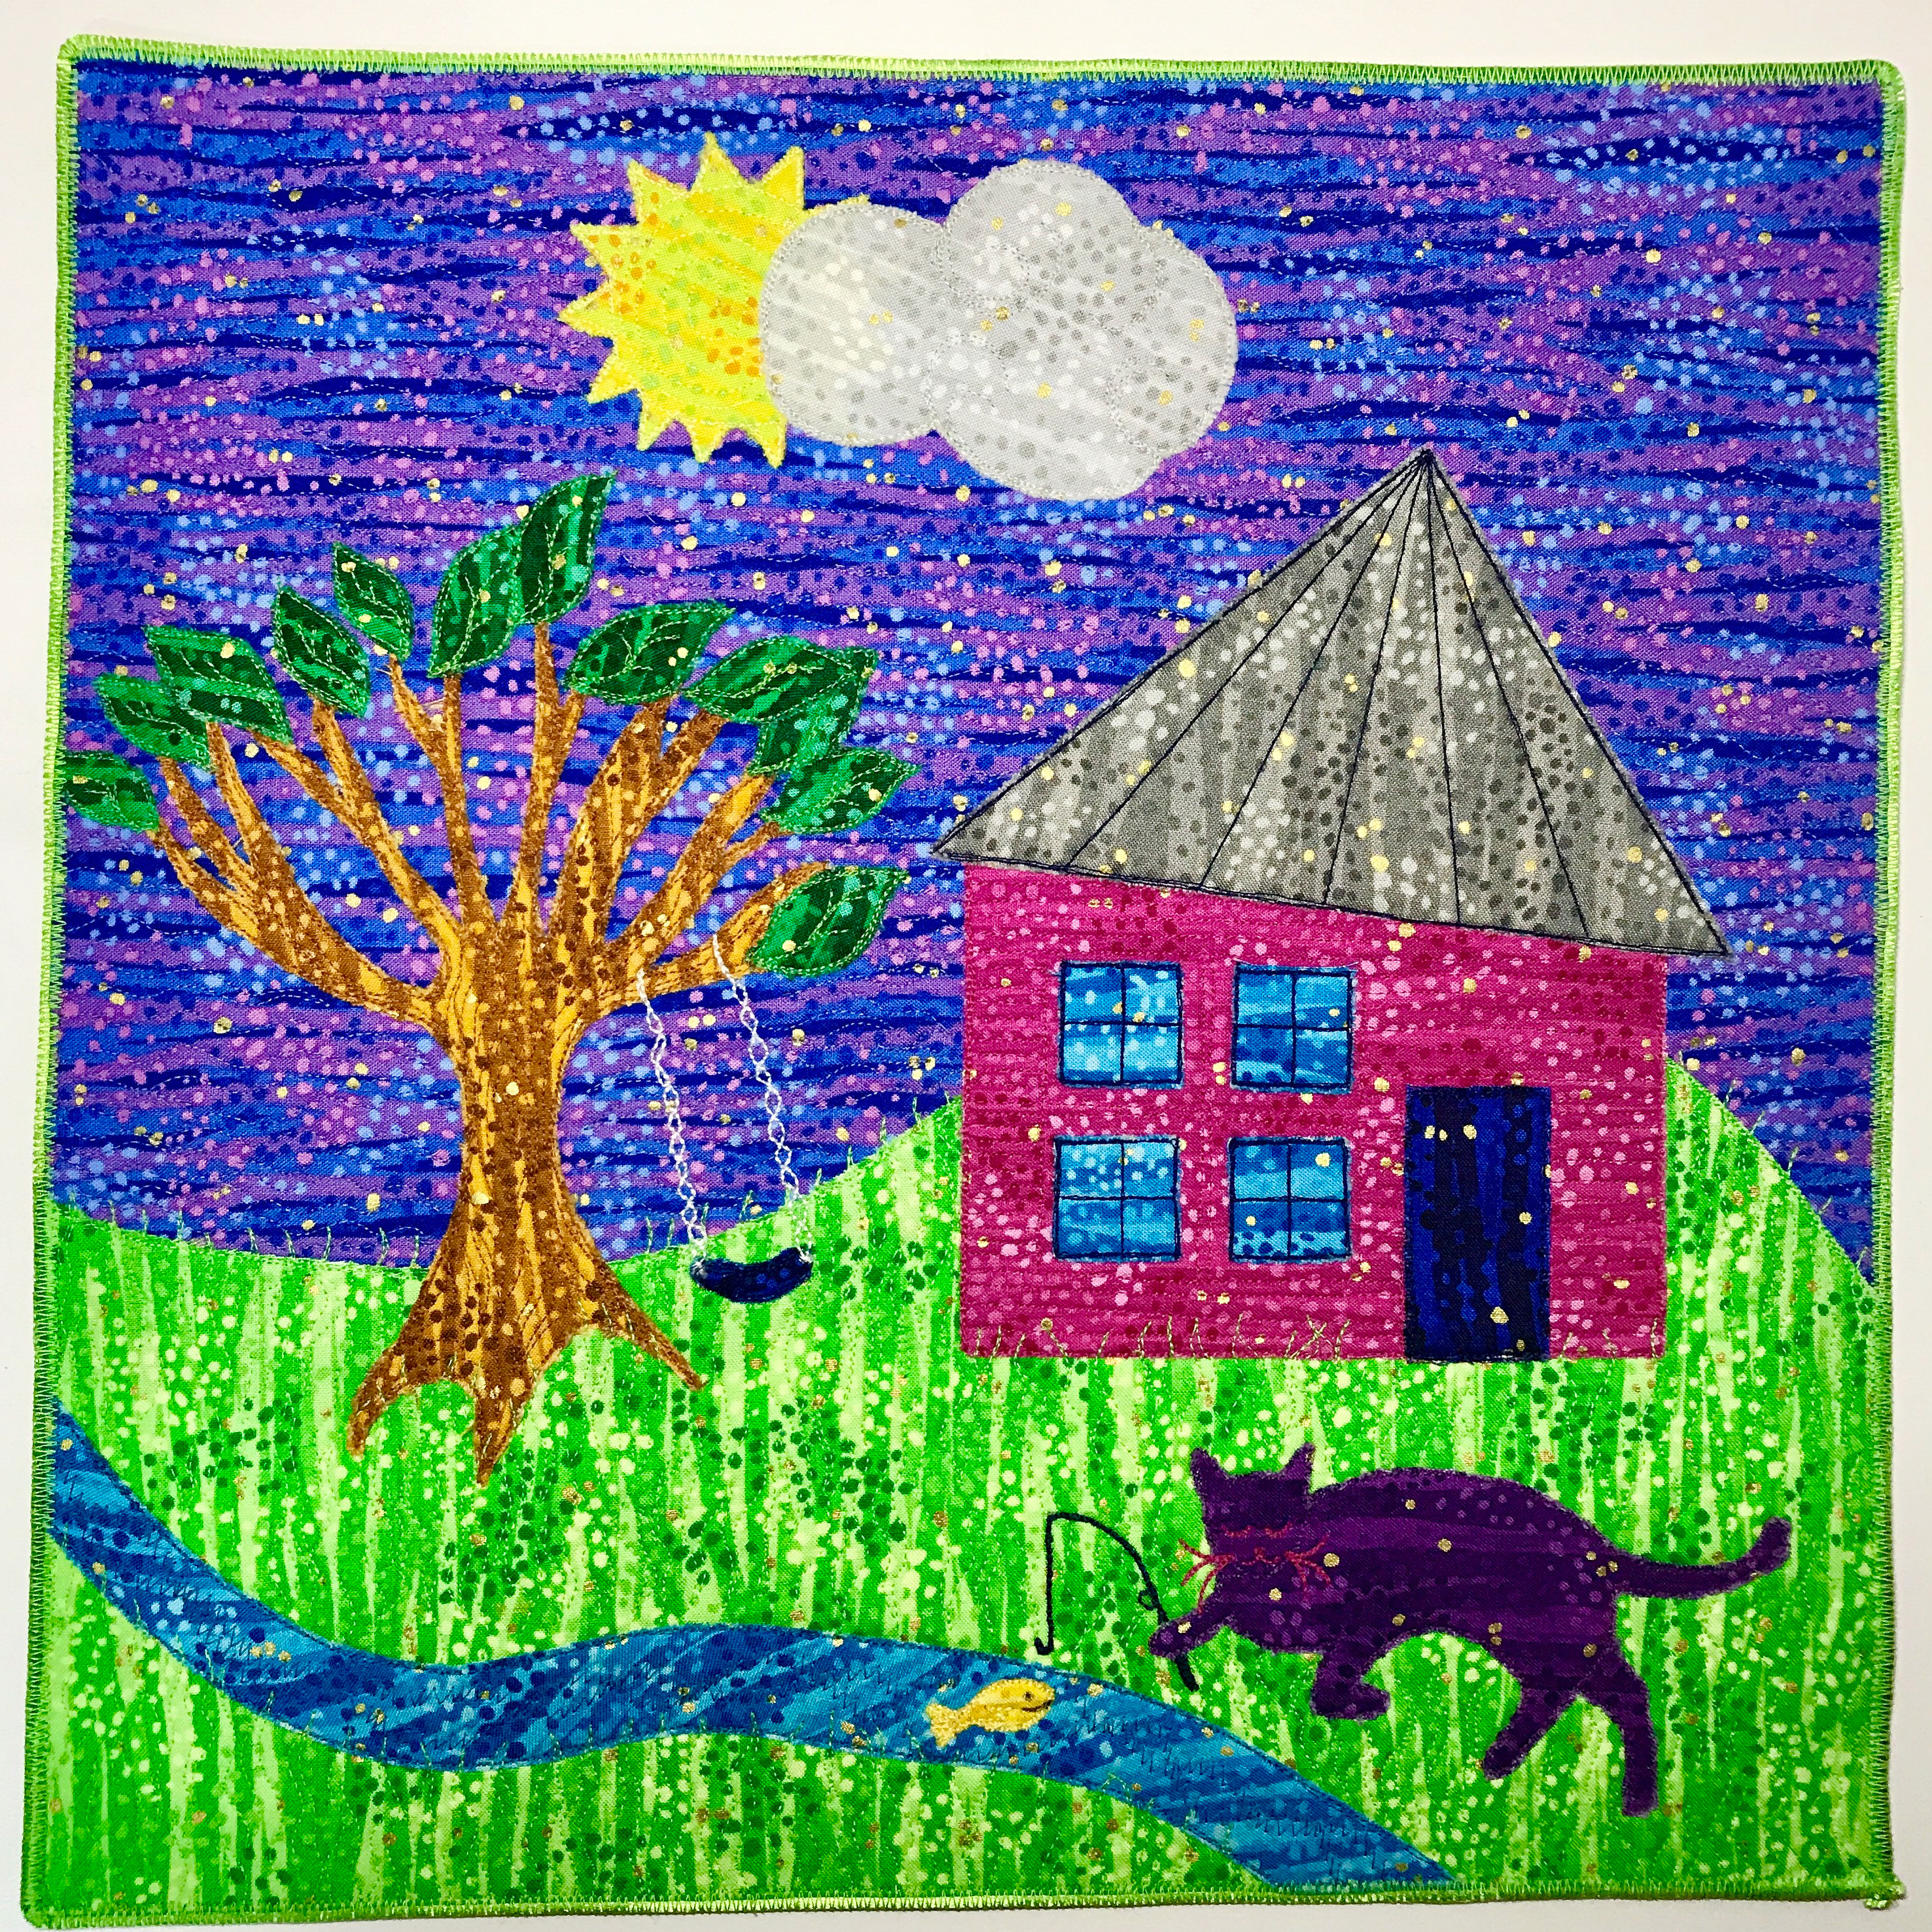
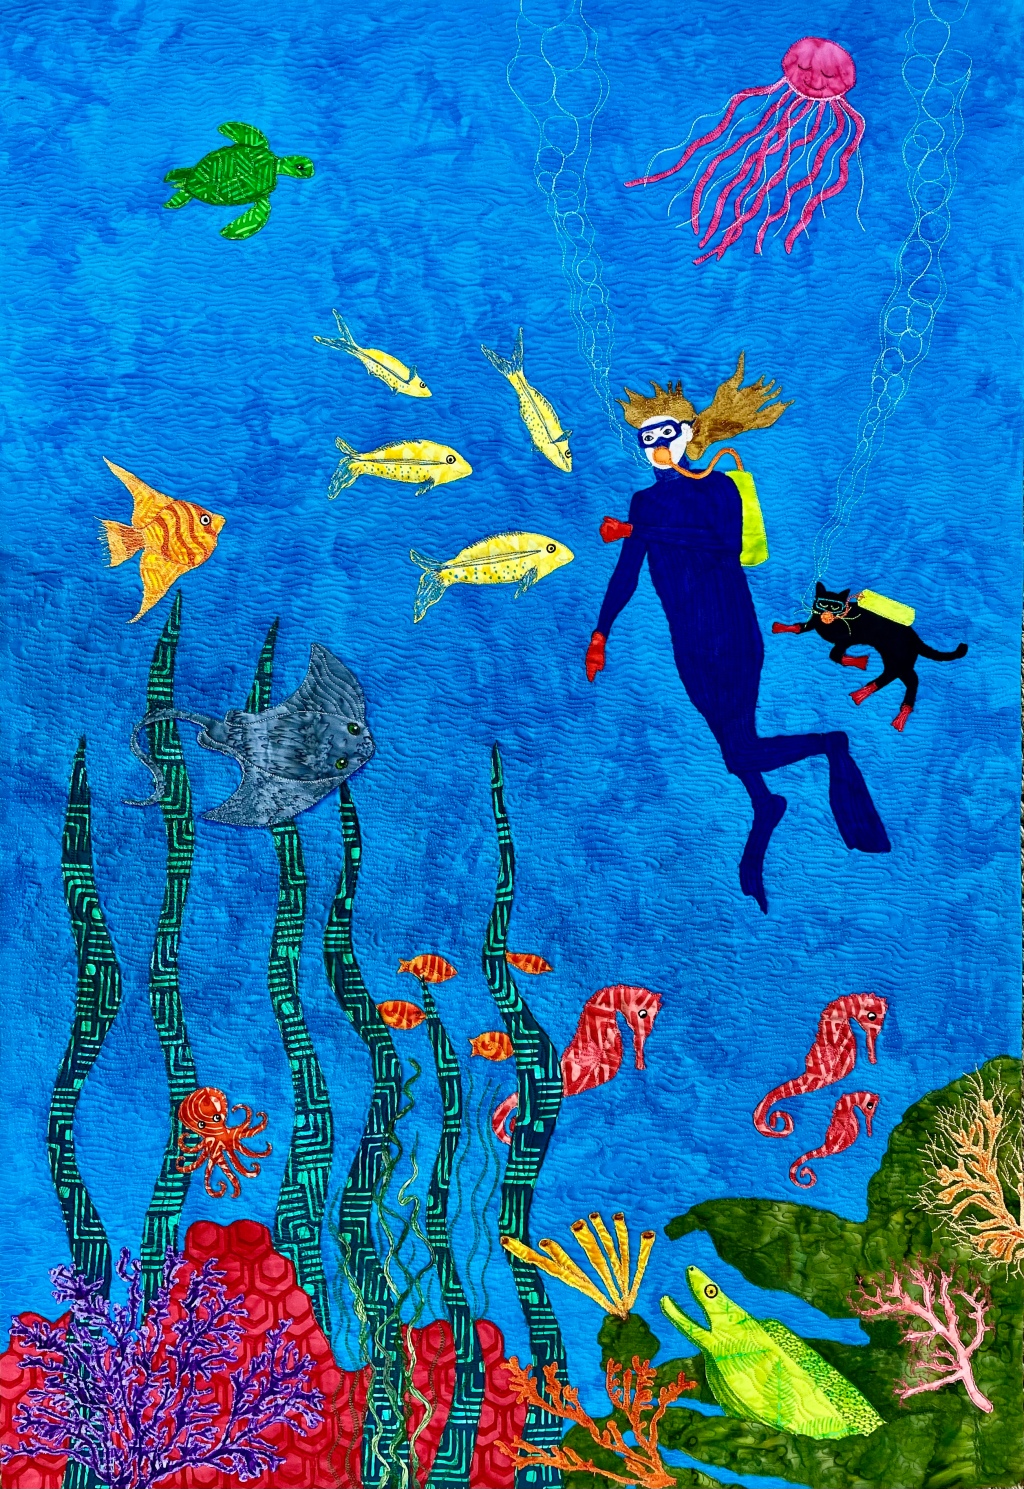
…and one of the real quilts I’ve created for this project. Thanks to the generosity of Windham Fabrics, Jamie Fingal’s awesome Heart of the Home project will deliver these to folks who furnish new homes for previously homeless women and children 💜.
PS do you find that, as you build your scene, elements are disappearing behind one another? This is easy to fix…layers appear as they are stacked in that upper-right hand corner of your screen. Simply drag them up/down until, for instance, the house is in front of the grass. If you eyeball the list of layers, you’ll notice that they are ordered front to back.


You must be logged in to post a comment.