


As Valentine’s Day approached, I had the joyful task of creating a valentine for my sweetie…what better inspiration than the sweet face of the new member of our family? After the heartbreak of losing Kane last summer, we were fortunate to bring this very beautiful girl into our family (OK, I’ll admit it, I’m biased).
All of my pieces begin with a photo…in this case, one that Eliot captured of his new kitchen helper right after she joined us:
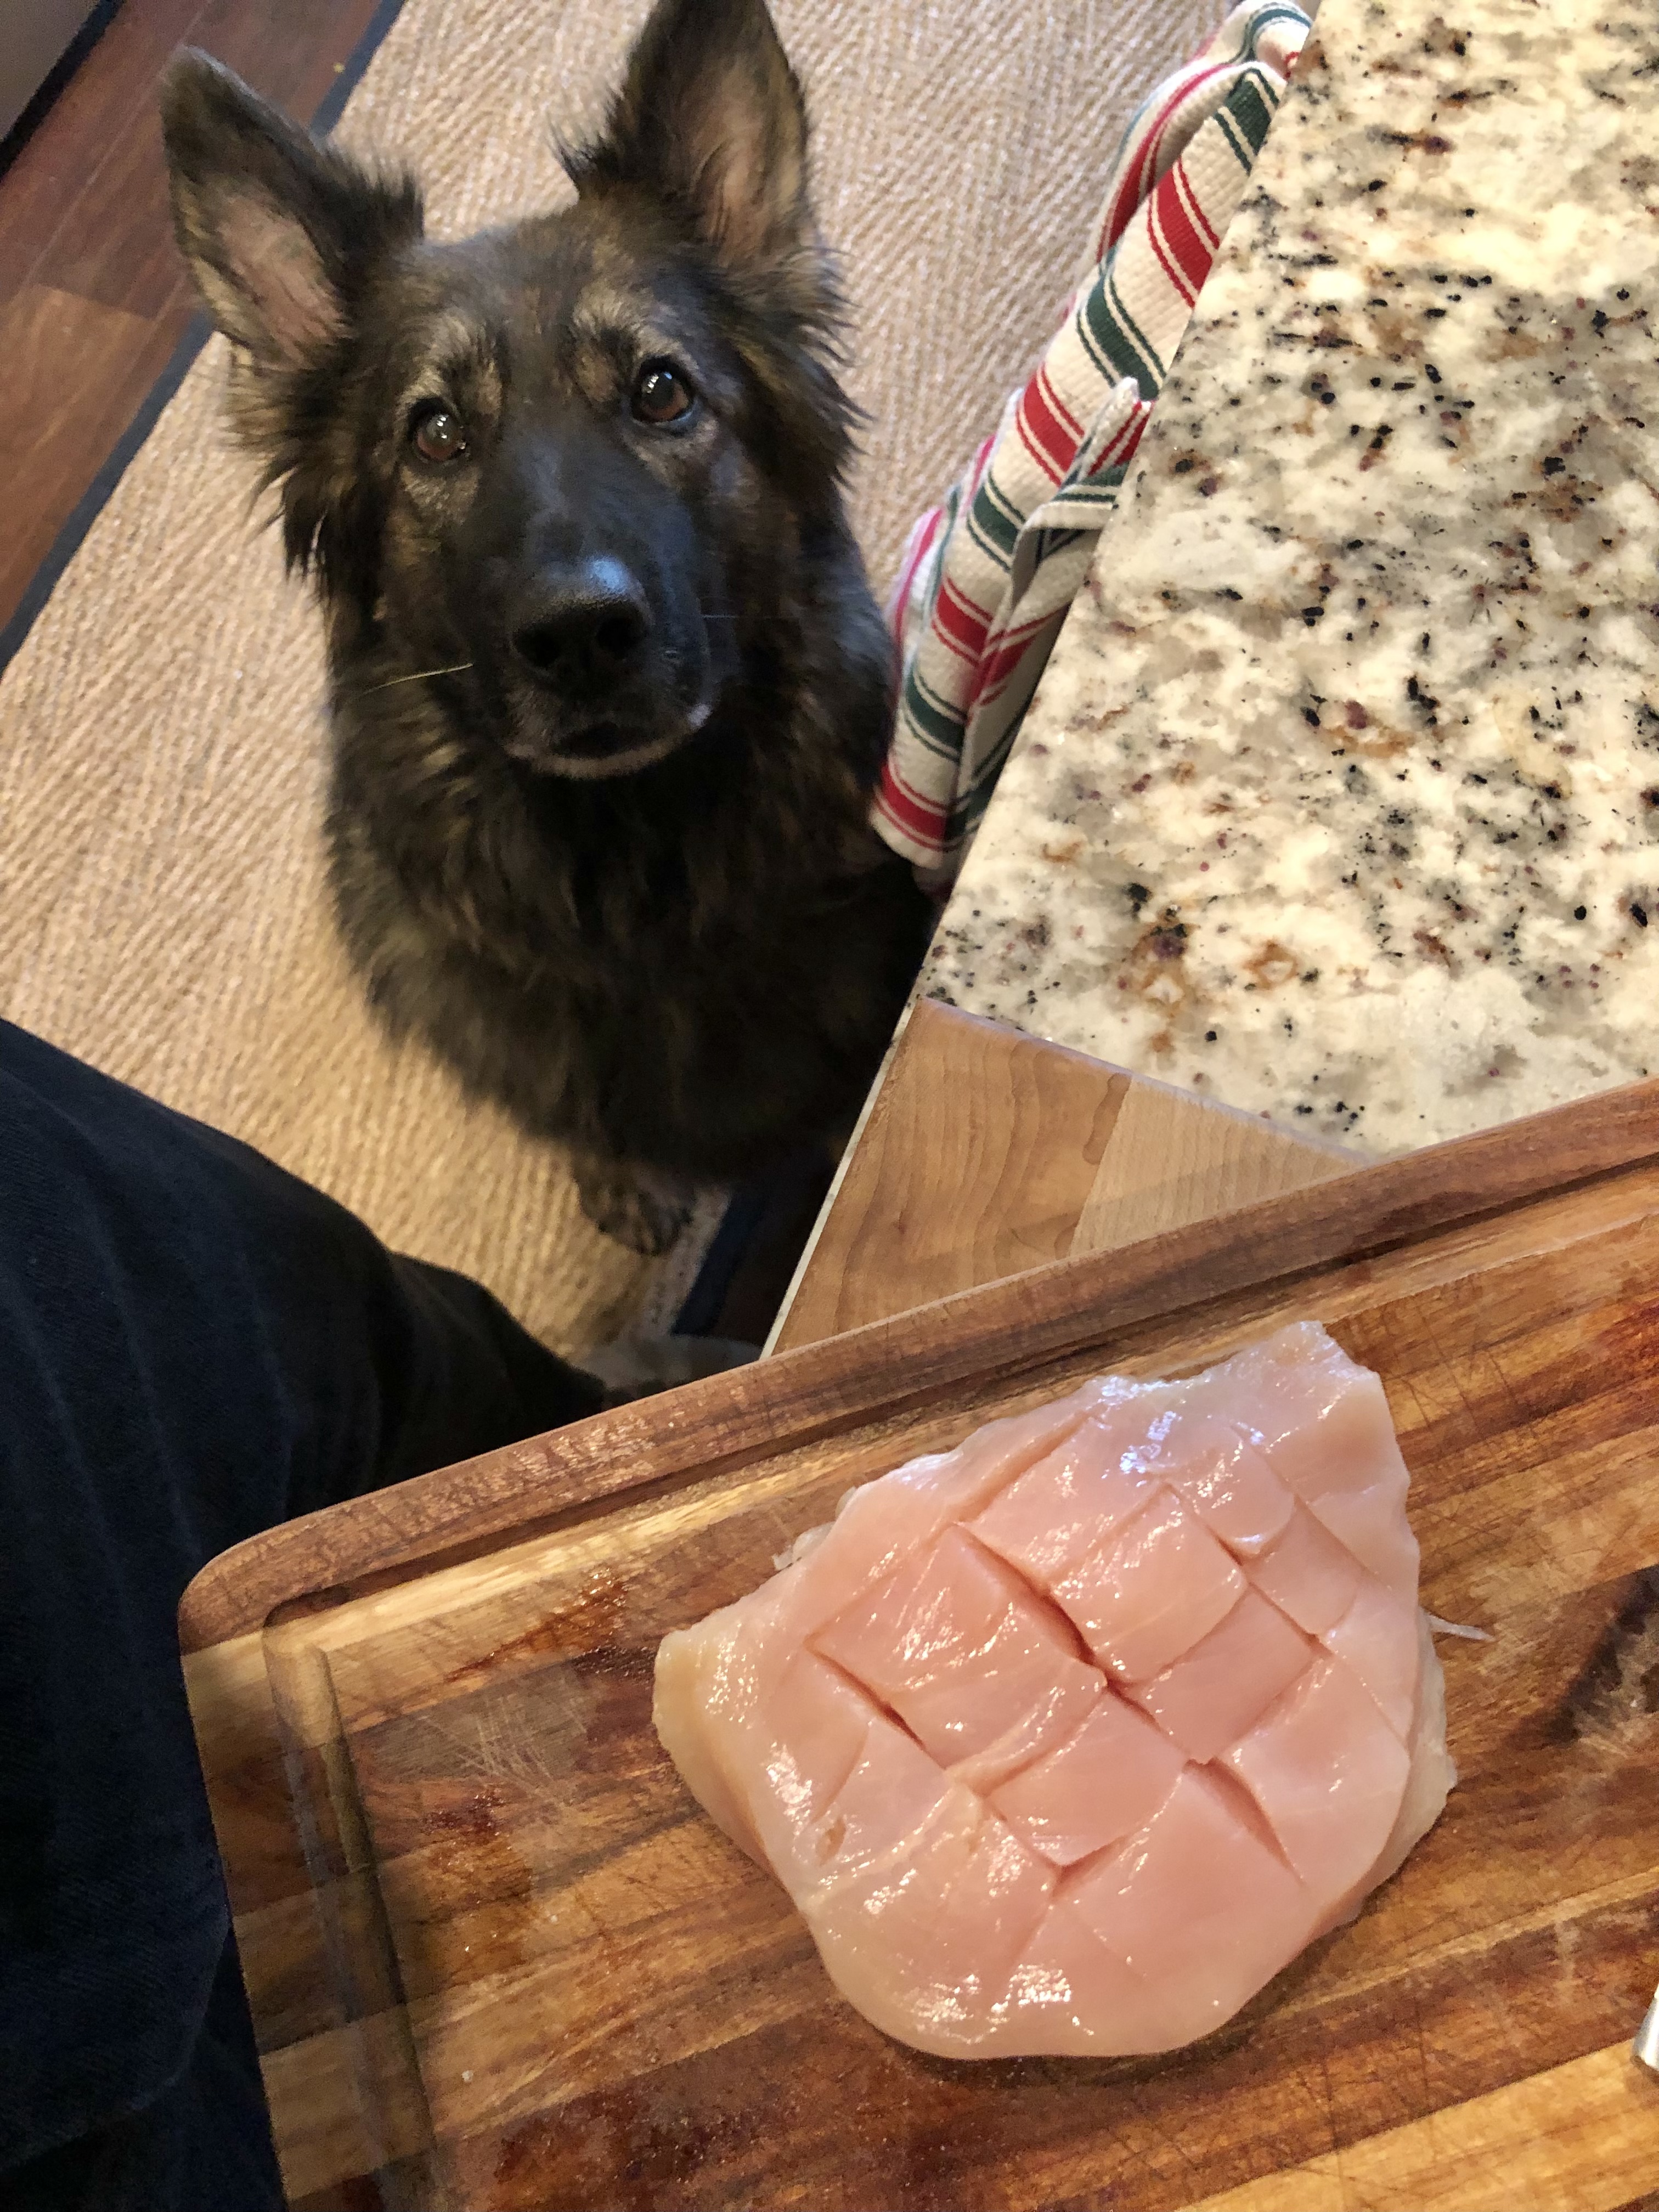
That look of adoration may have had something to do with the chicken breast 😆, but it worked! Cropping it to focus on her face…

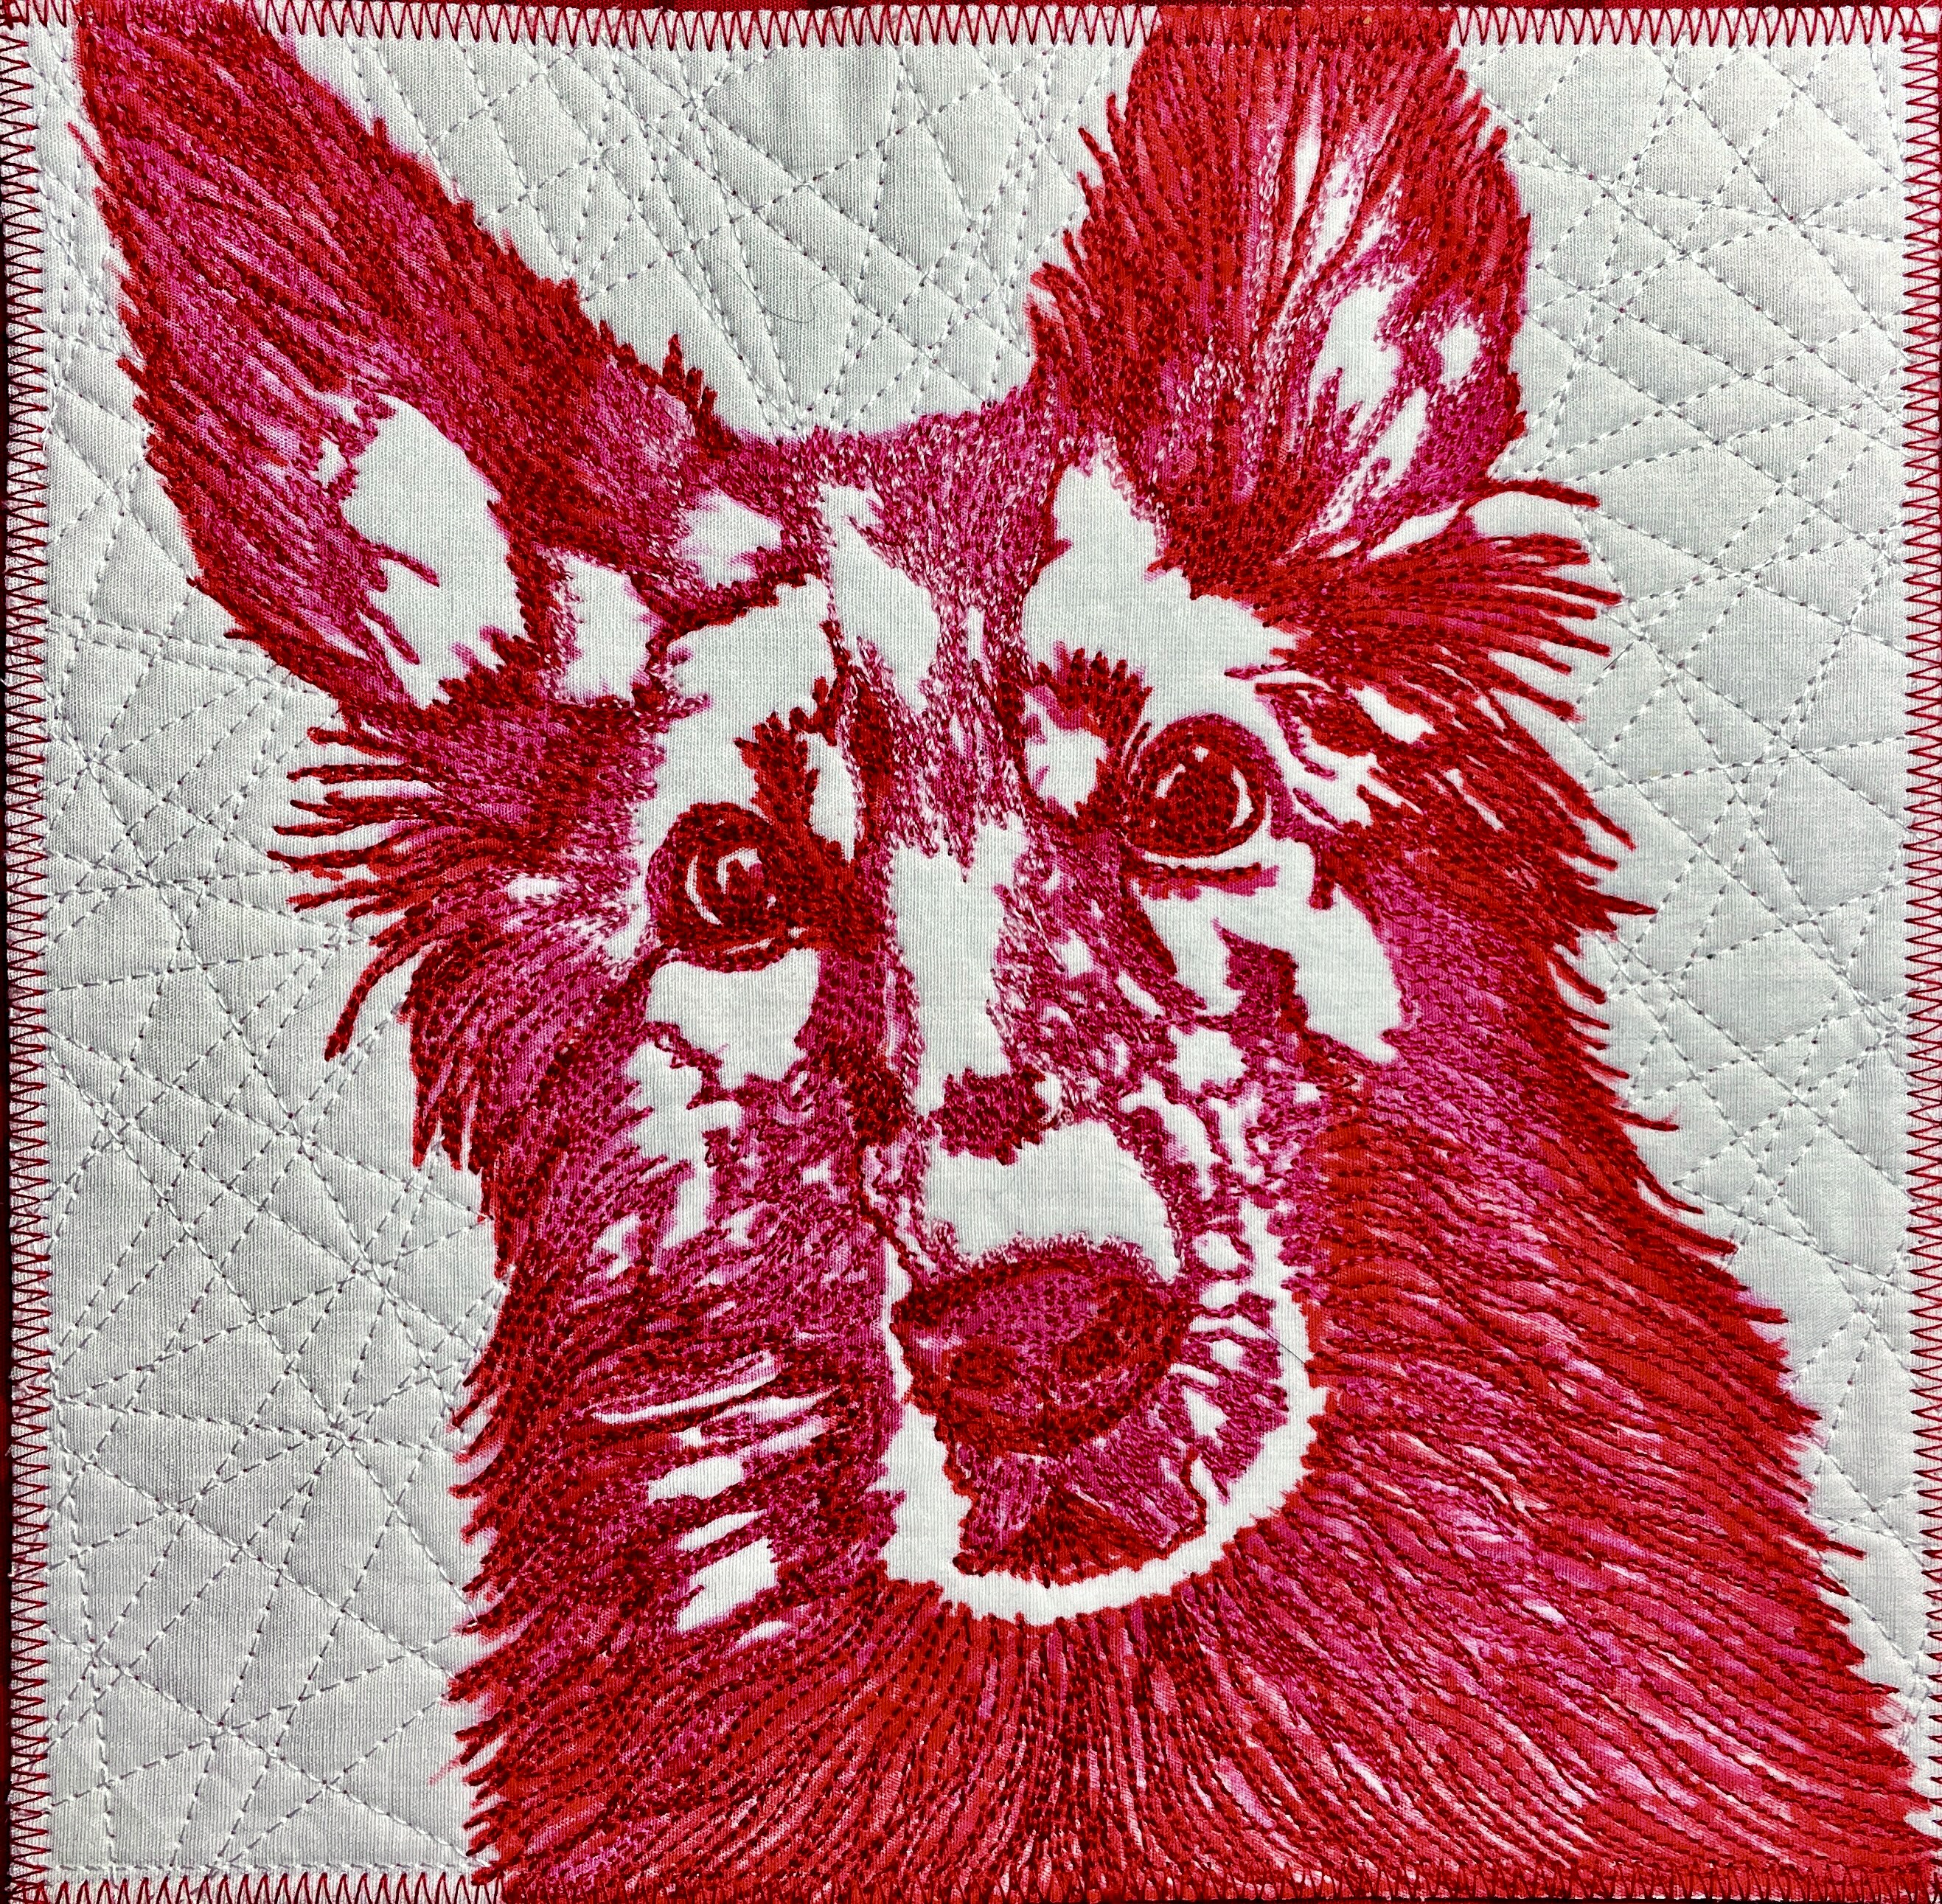
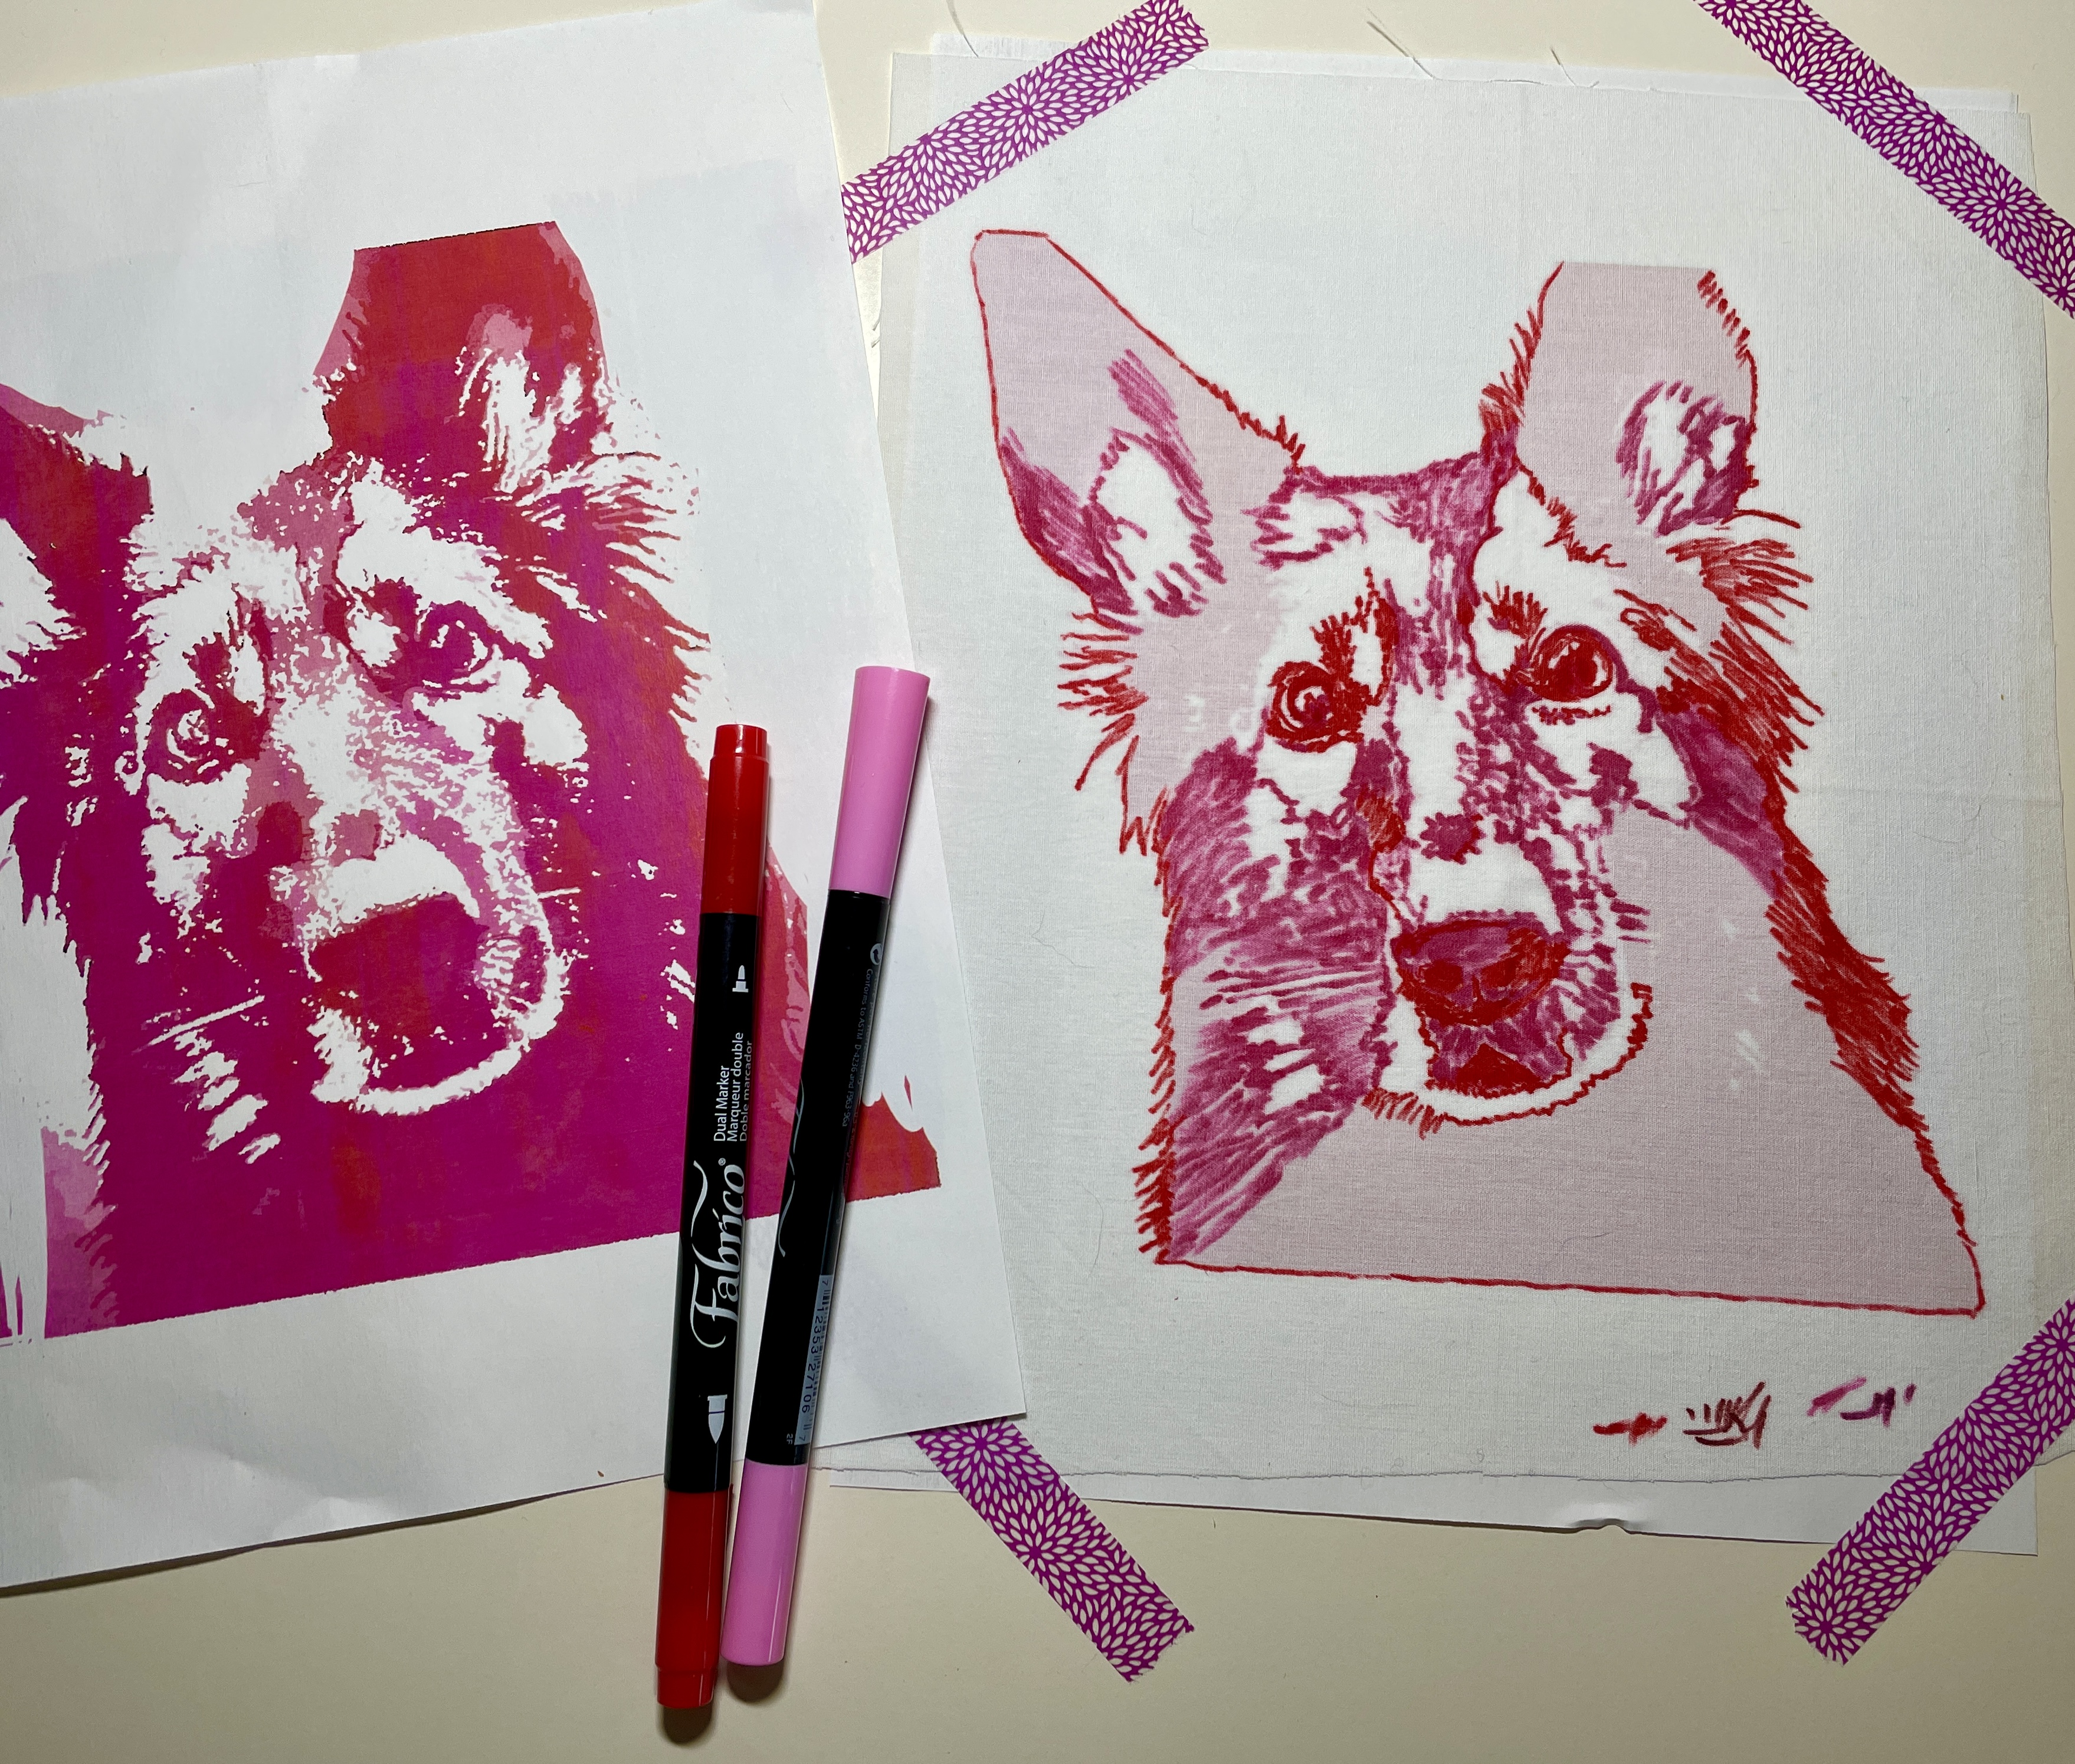
Awww. I played with color filters and thought about my usual raw-edged fused applique, but her amazing fur coat was going to make that a bit of a challenge and time was short. Solution: my ink-and-thread technique which I developed for Quilting Arts TV a few years ago, using my beloved Tsukineko inks and Aurifil 50wt thread. I decided to go with my new obsession, Aurifil 28 wt…you all really need this large selection—-
(Not a sponsored post here! I ‘helped’ Santa with his shopping ;)…. https://www.aurifil.com/best-selection-28wt Keeping things simple, I opted for 3 shades of light, medium and dark hues for both the Tsukineko pens and my thread.
Next step, run the photo through the Popsicolor app…
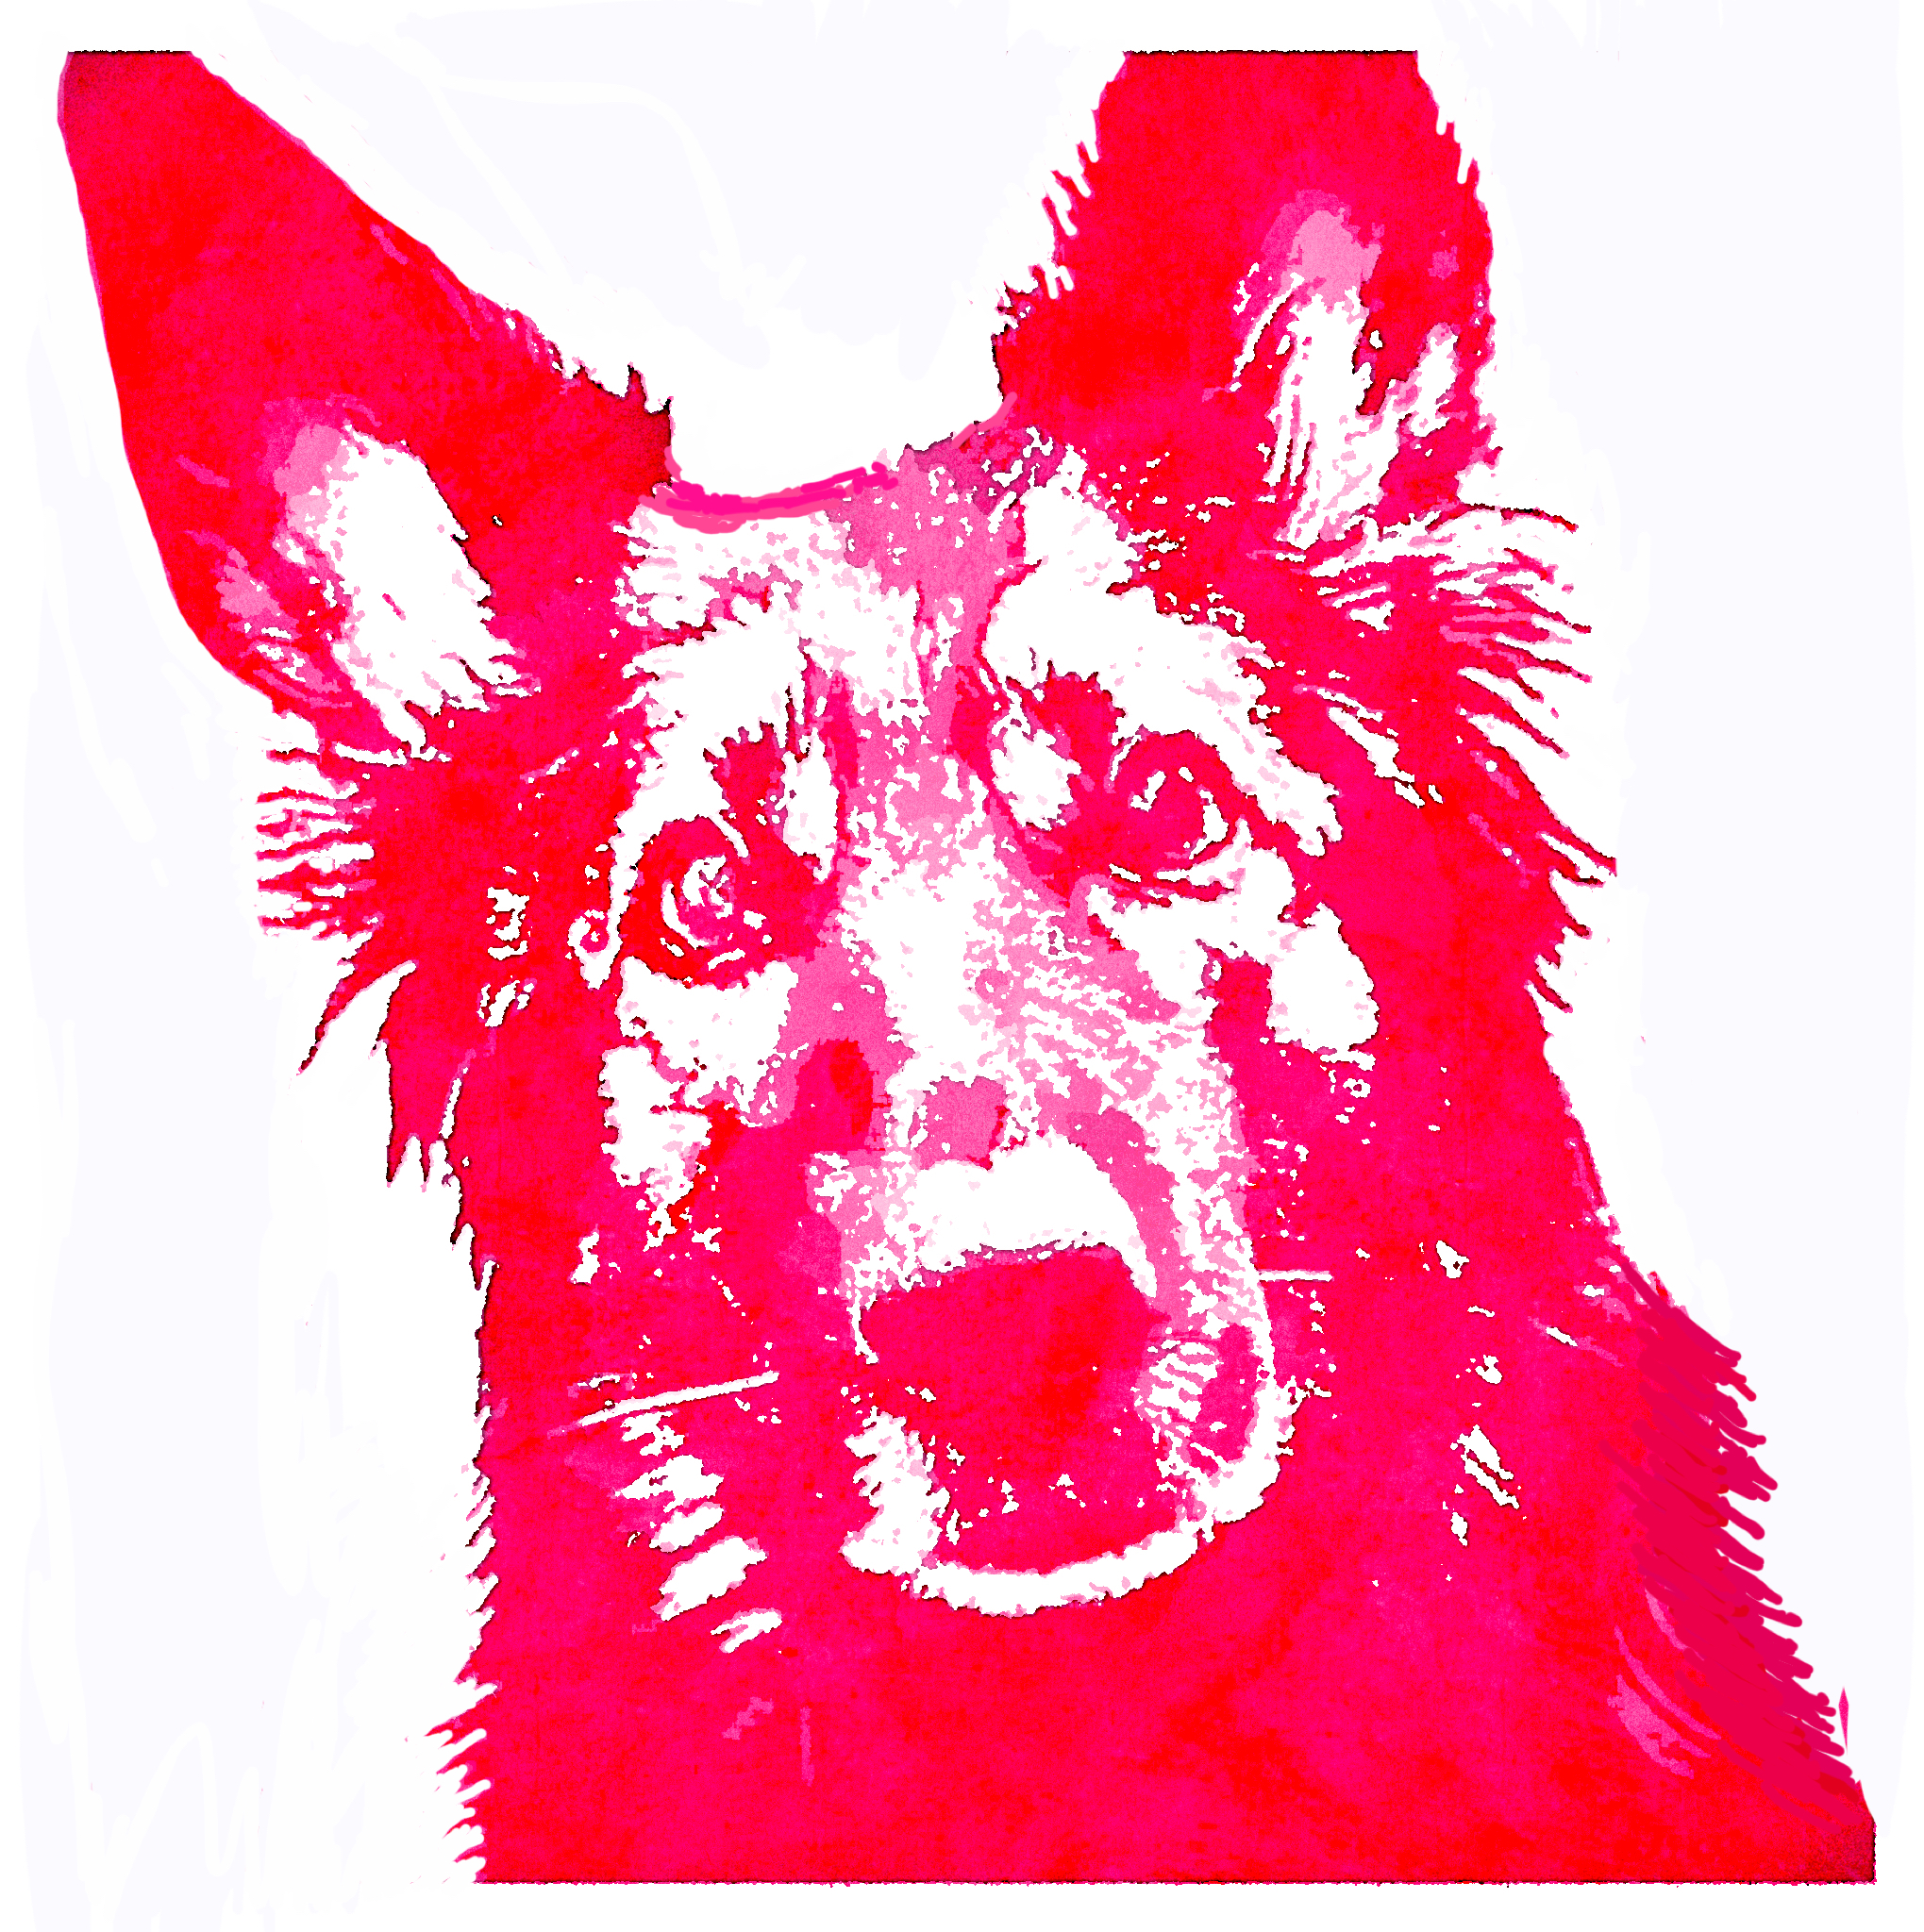
I printed this image (2 copies), then Mistyfused a square of white batik (important to use batik for this technique – higher thread count, less bleeding of ink). To trace the image, you may need a lightbox…or, if you have a near-white counter surface as I do, you can tape the printed image and the fabric down so they won’t shift (thank goodness for washi tape). See why you want the second copy? It can be super useful for reference. Now apply ink in the same direction as the fur growth (the original photo can be helpful here as well).
When you have inked in every mark you see, time to fuse to batting and backing, then stitch over those areas with the colored thread in 28wt. I like to free-motion quilt here…you could do a straight stitch and slowly guide the piece but FMQ will be much faster!
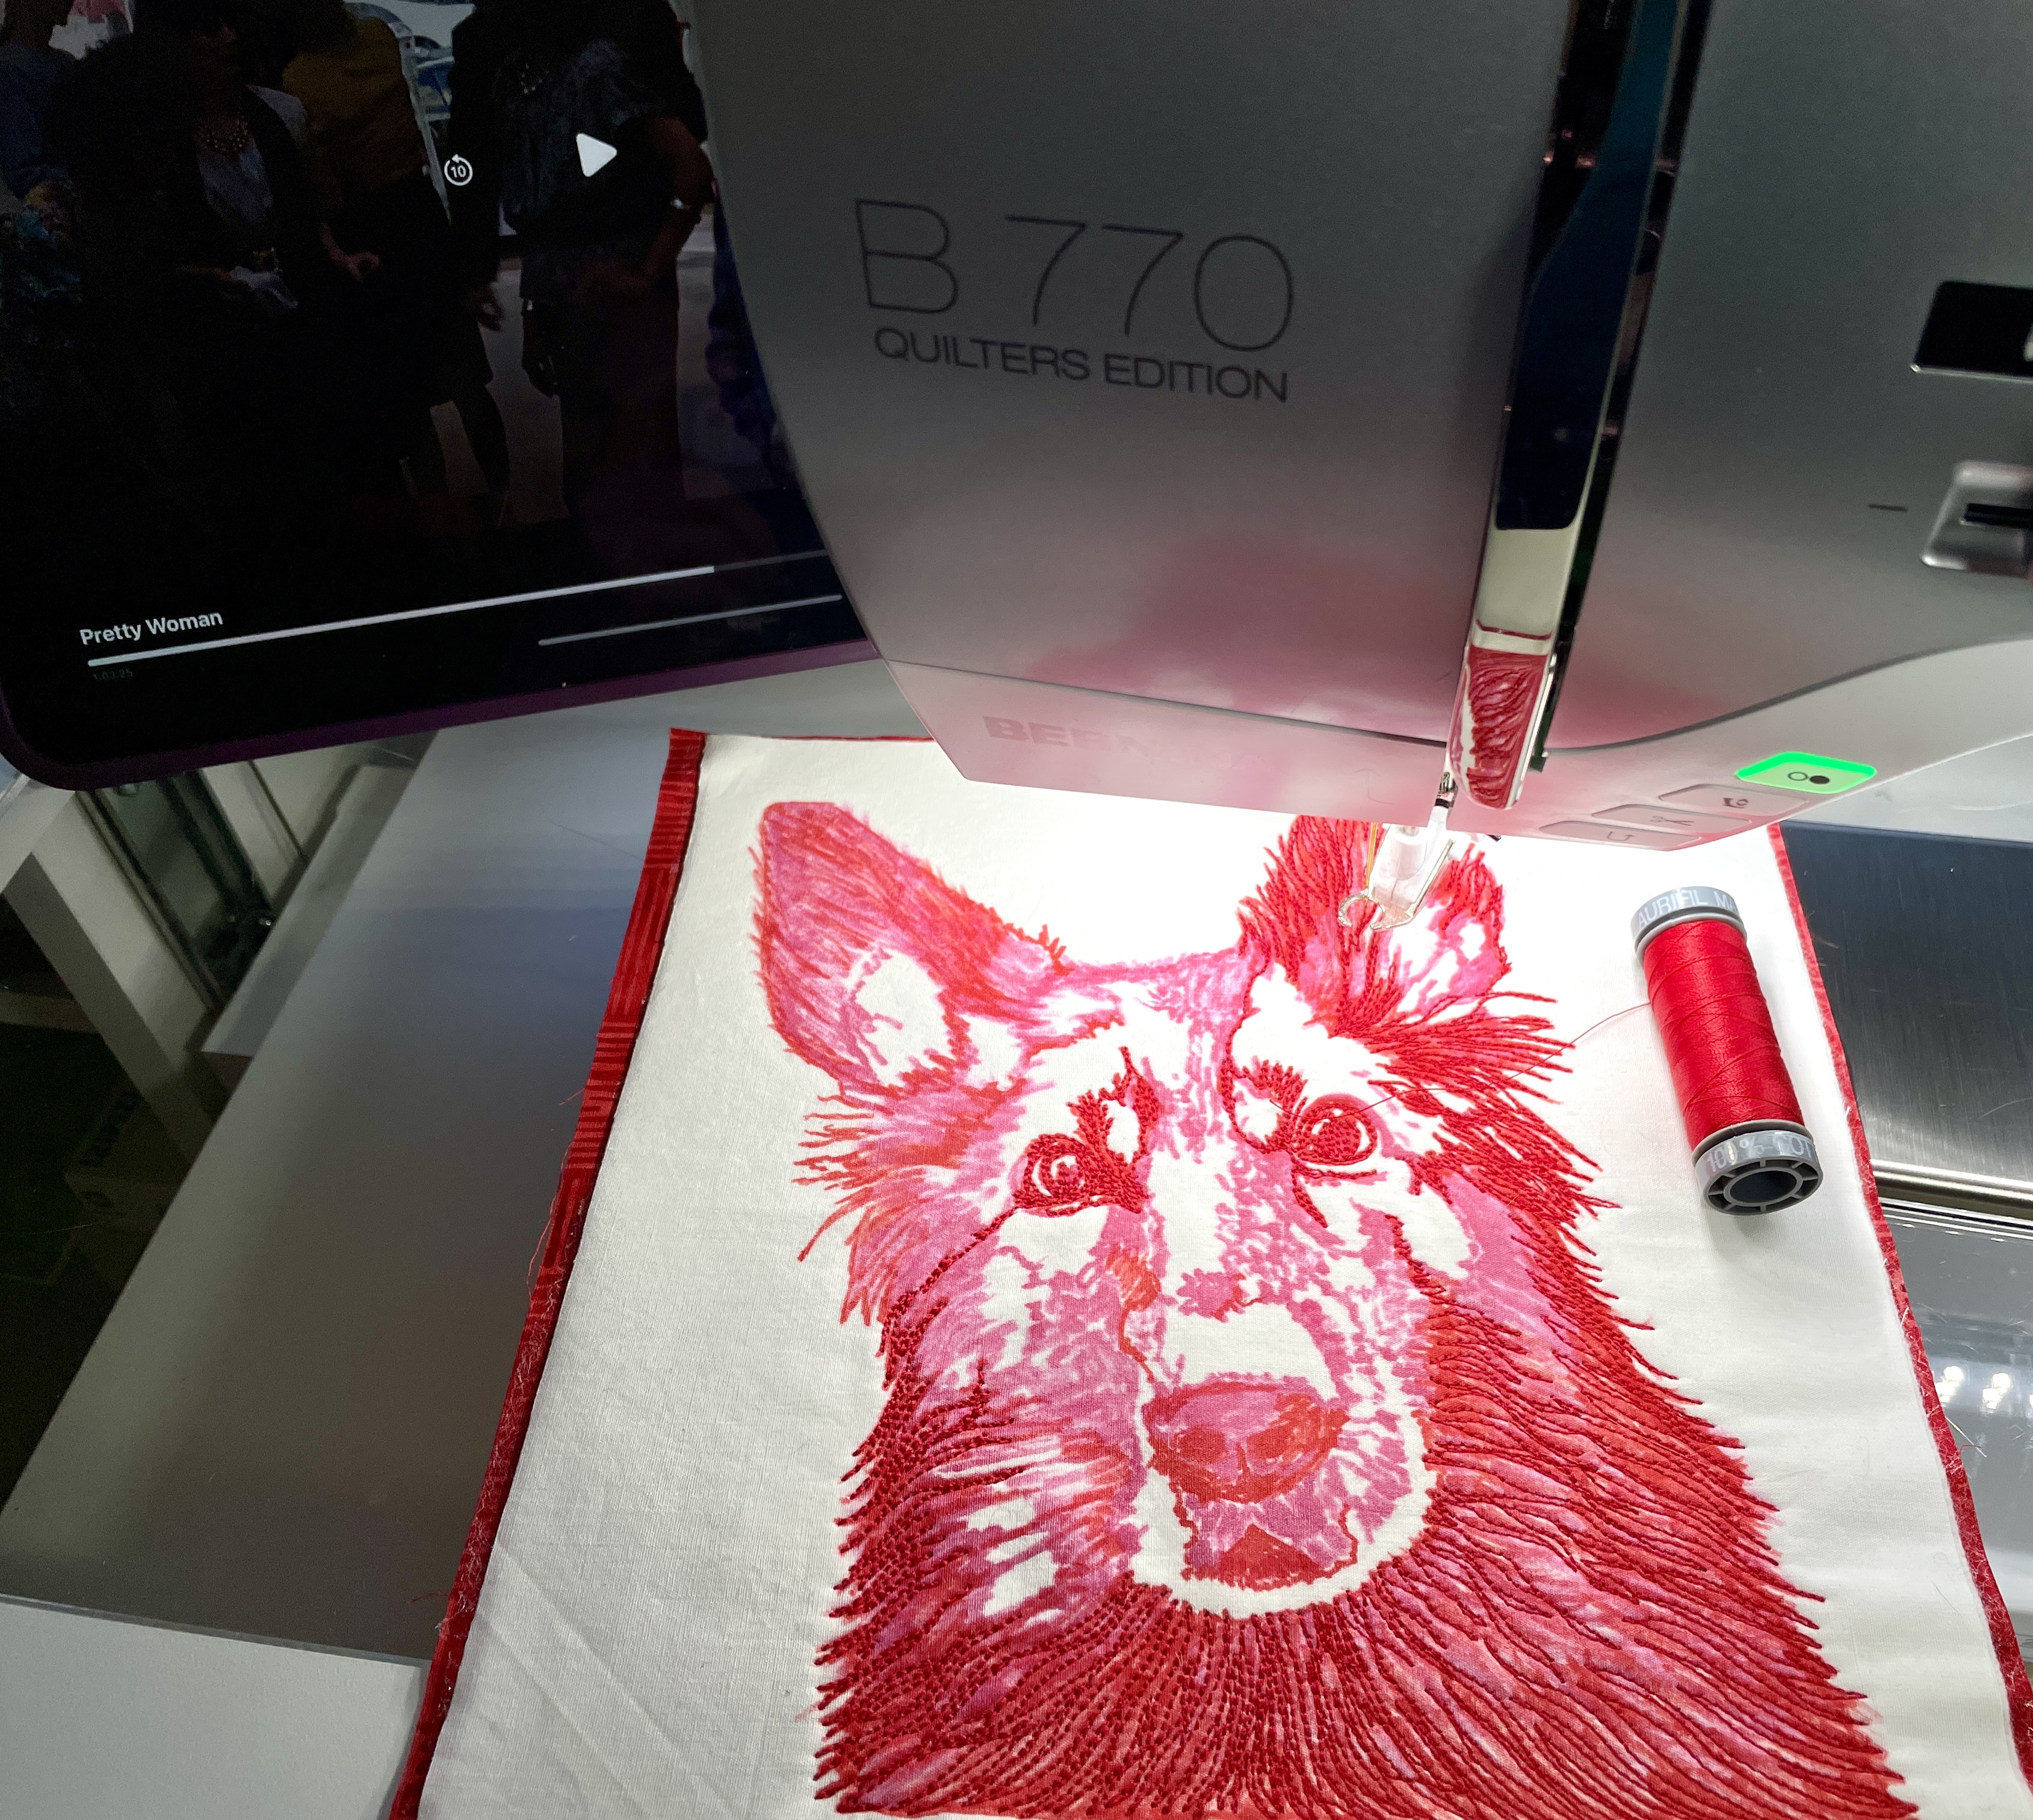
I worked with the red first, then the dark pink, then the light pink where there were highlighted areas. Once this stitching is done, quilt out the background with 50wt white Aurifil in a series of straight lines crossing each other…here I do raise the feed dogs and let my Bernina make sure the lines are straight, in contrast with my subject’s flowing fur ;).
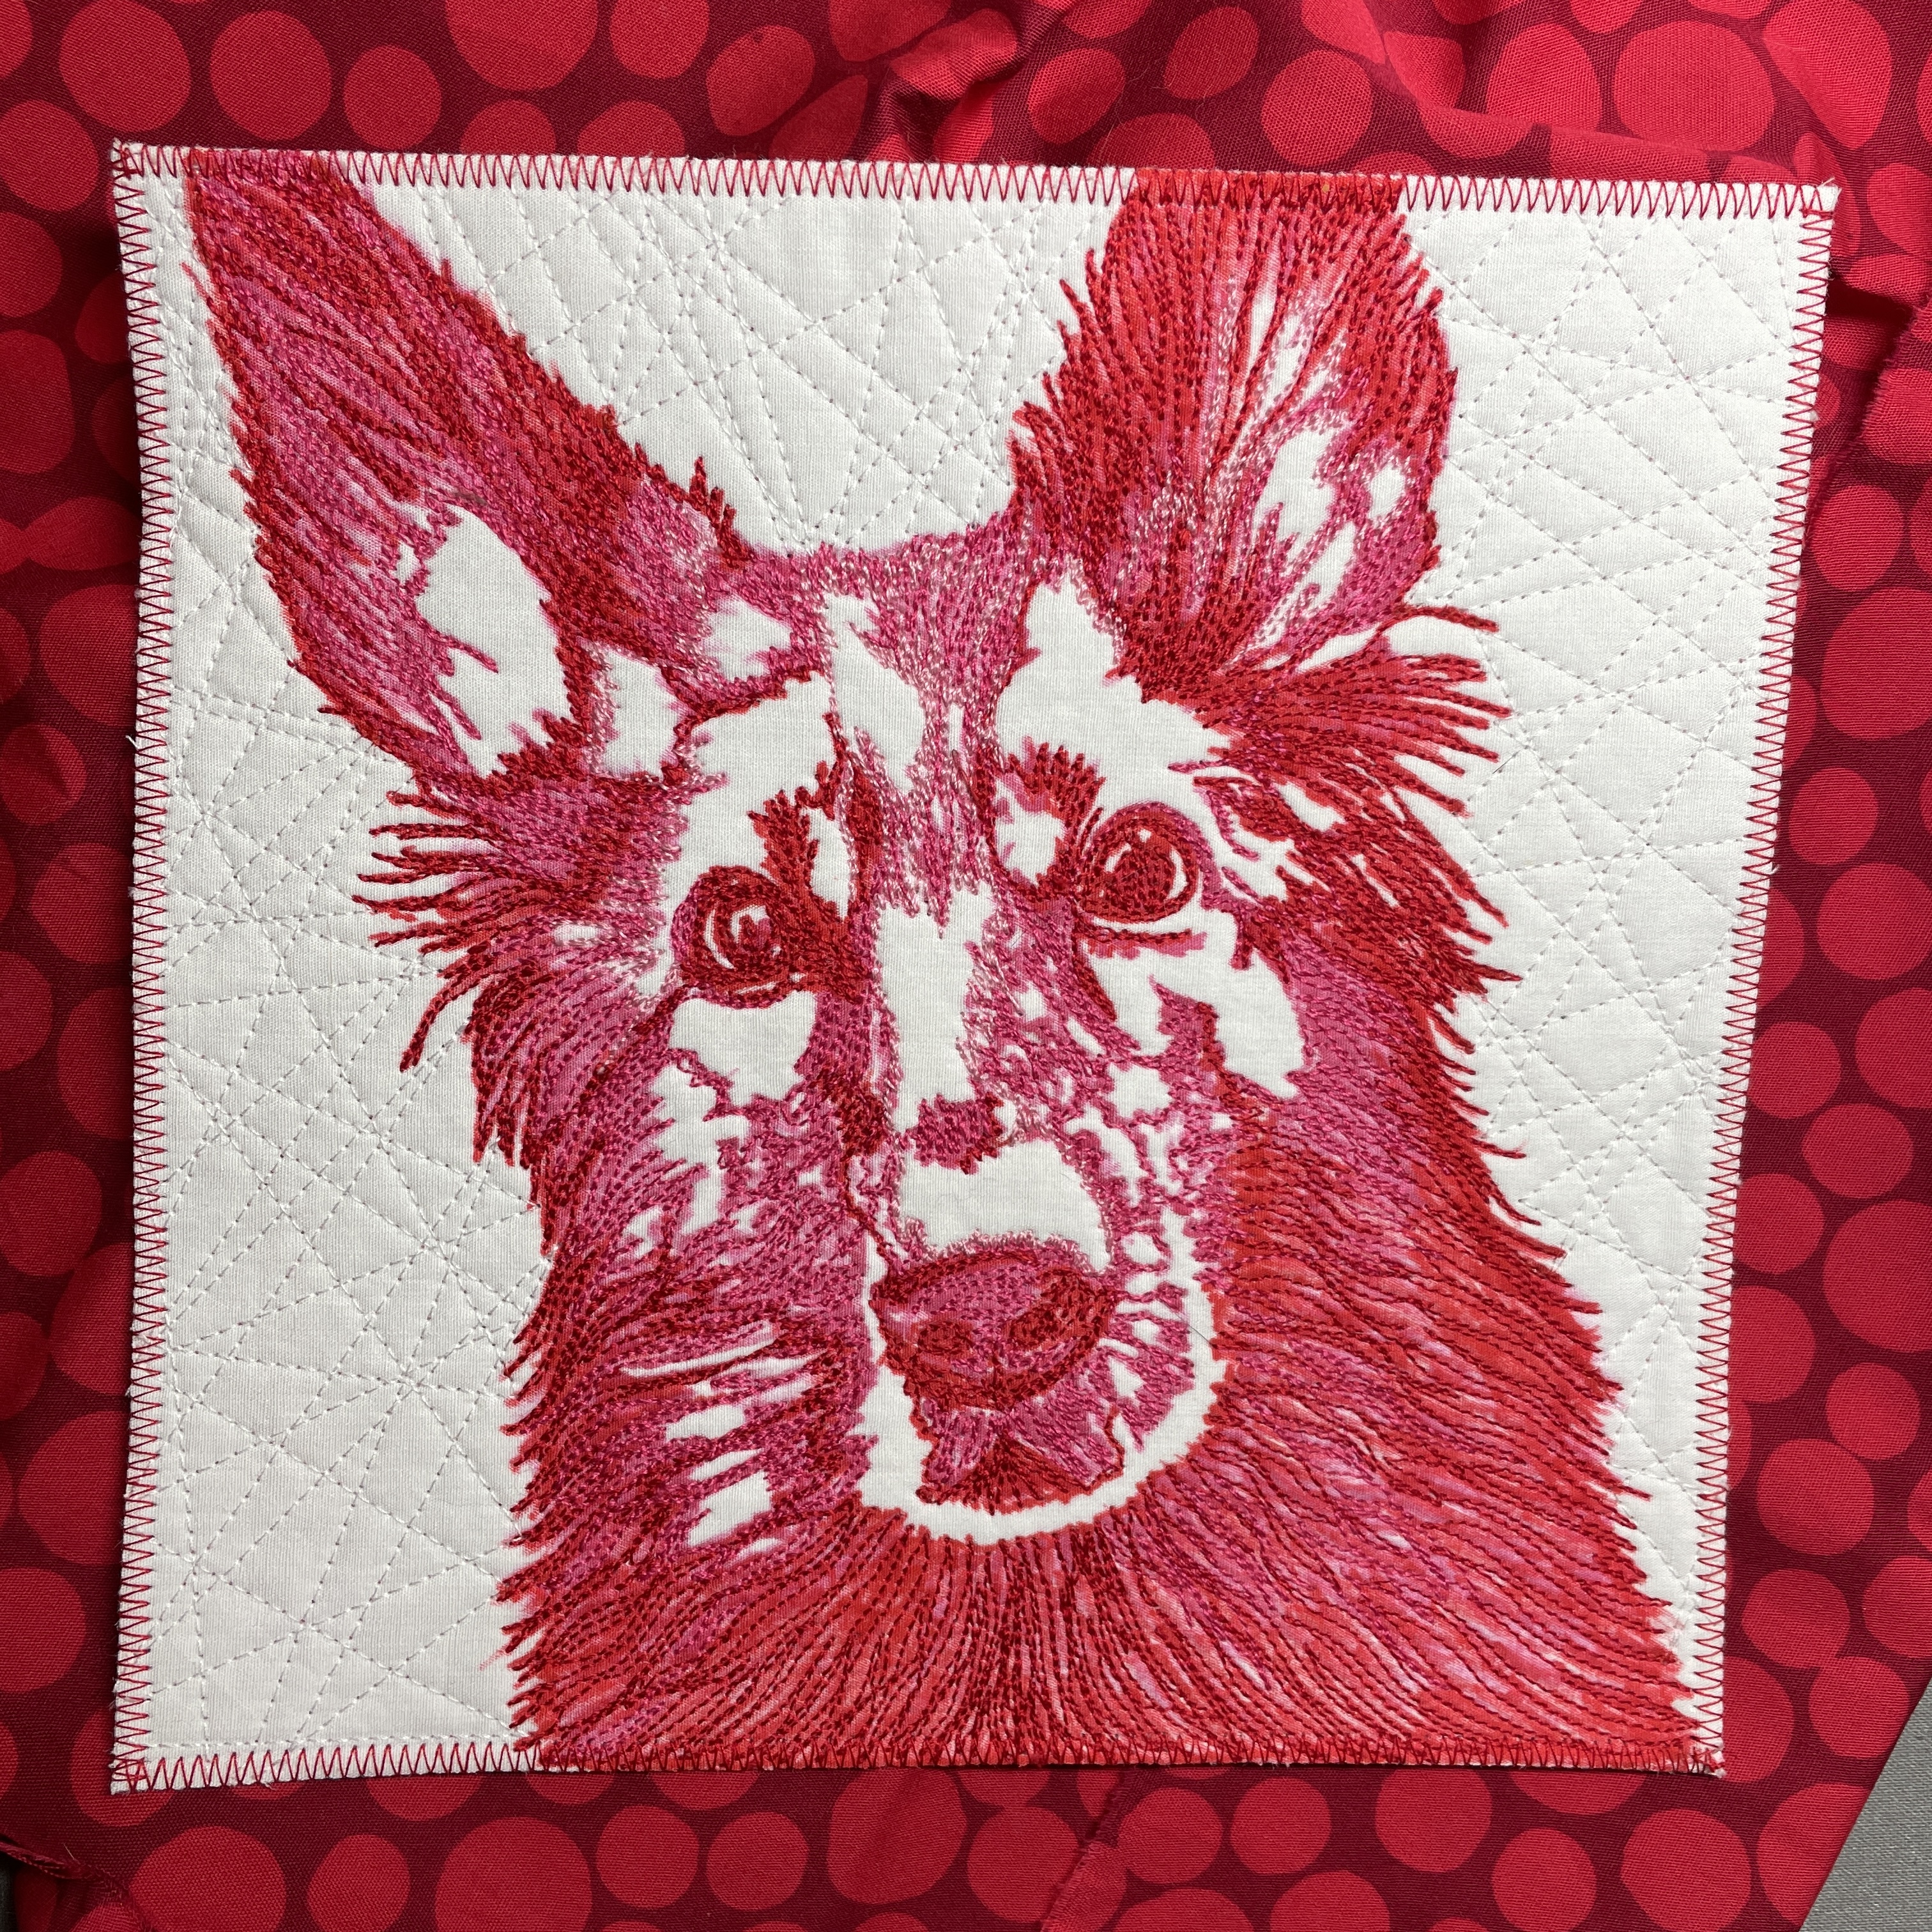
To finish, trim edges and zigzag with one of the colors used for fun!
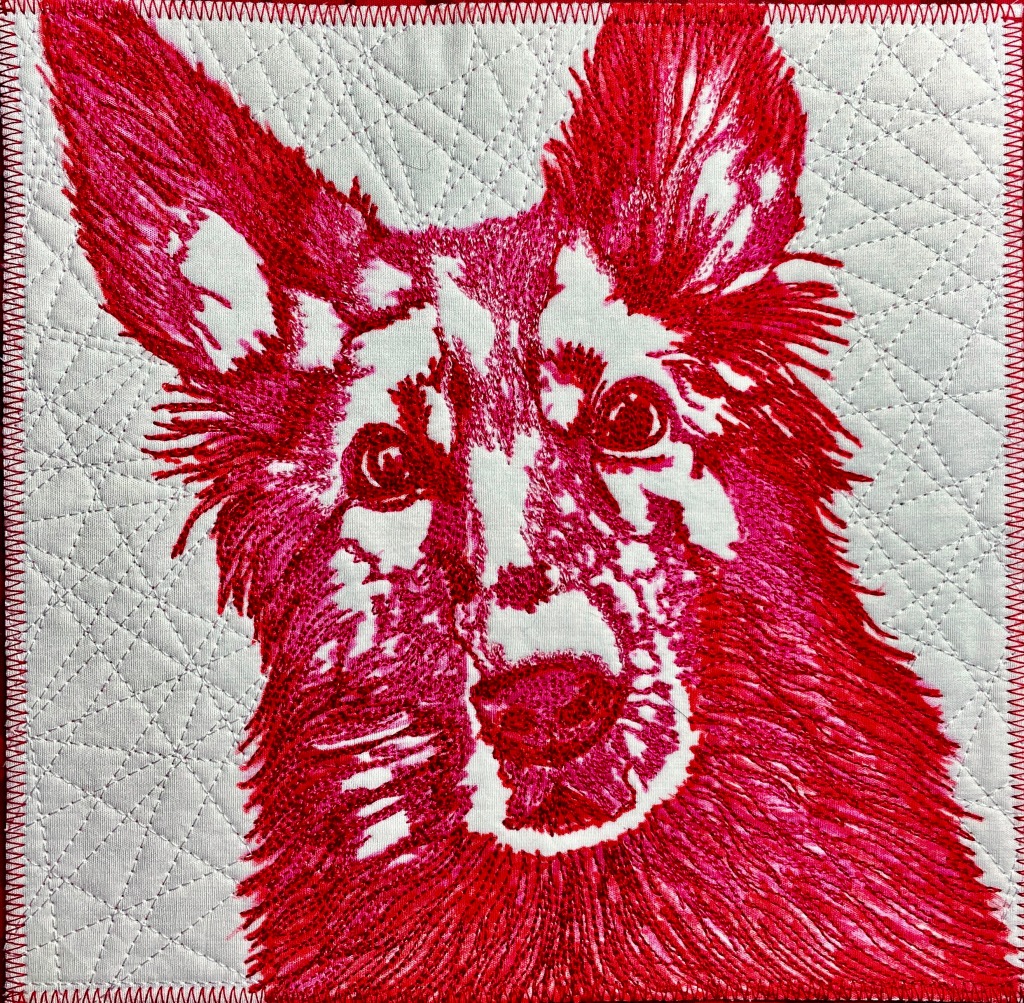
As much as I loved this technique with my 50wt, I think the 28wt really makes it shine – what do you think? ✨


You must be logged in to post a comment.