Are you hooked on those plastic-binder 8-ring notebooks into which you can easily slip pages? Our household is…we love our apps but somehow there is still a major role for paper and ink.
I had made a cover for one of these notebooks out of Carol Eaton’s amazing fabric…which inspired my product development team (that would be my husband) to suggest a black leather version.
If you would like to try this, first trace 2 rectangles on very stiff fusible (I use Peltex II) that are just a little larger than the plastic covers. The plastic notebook covers pop off easily for use as templates. I suggest trying an extra 3/8th inch on all sides.
Then, assemble these project-specific ingredients:
- Needles for stitching through leather
- A piece of soft pliable leather…roughly the size of a far quarter
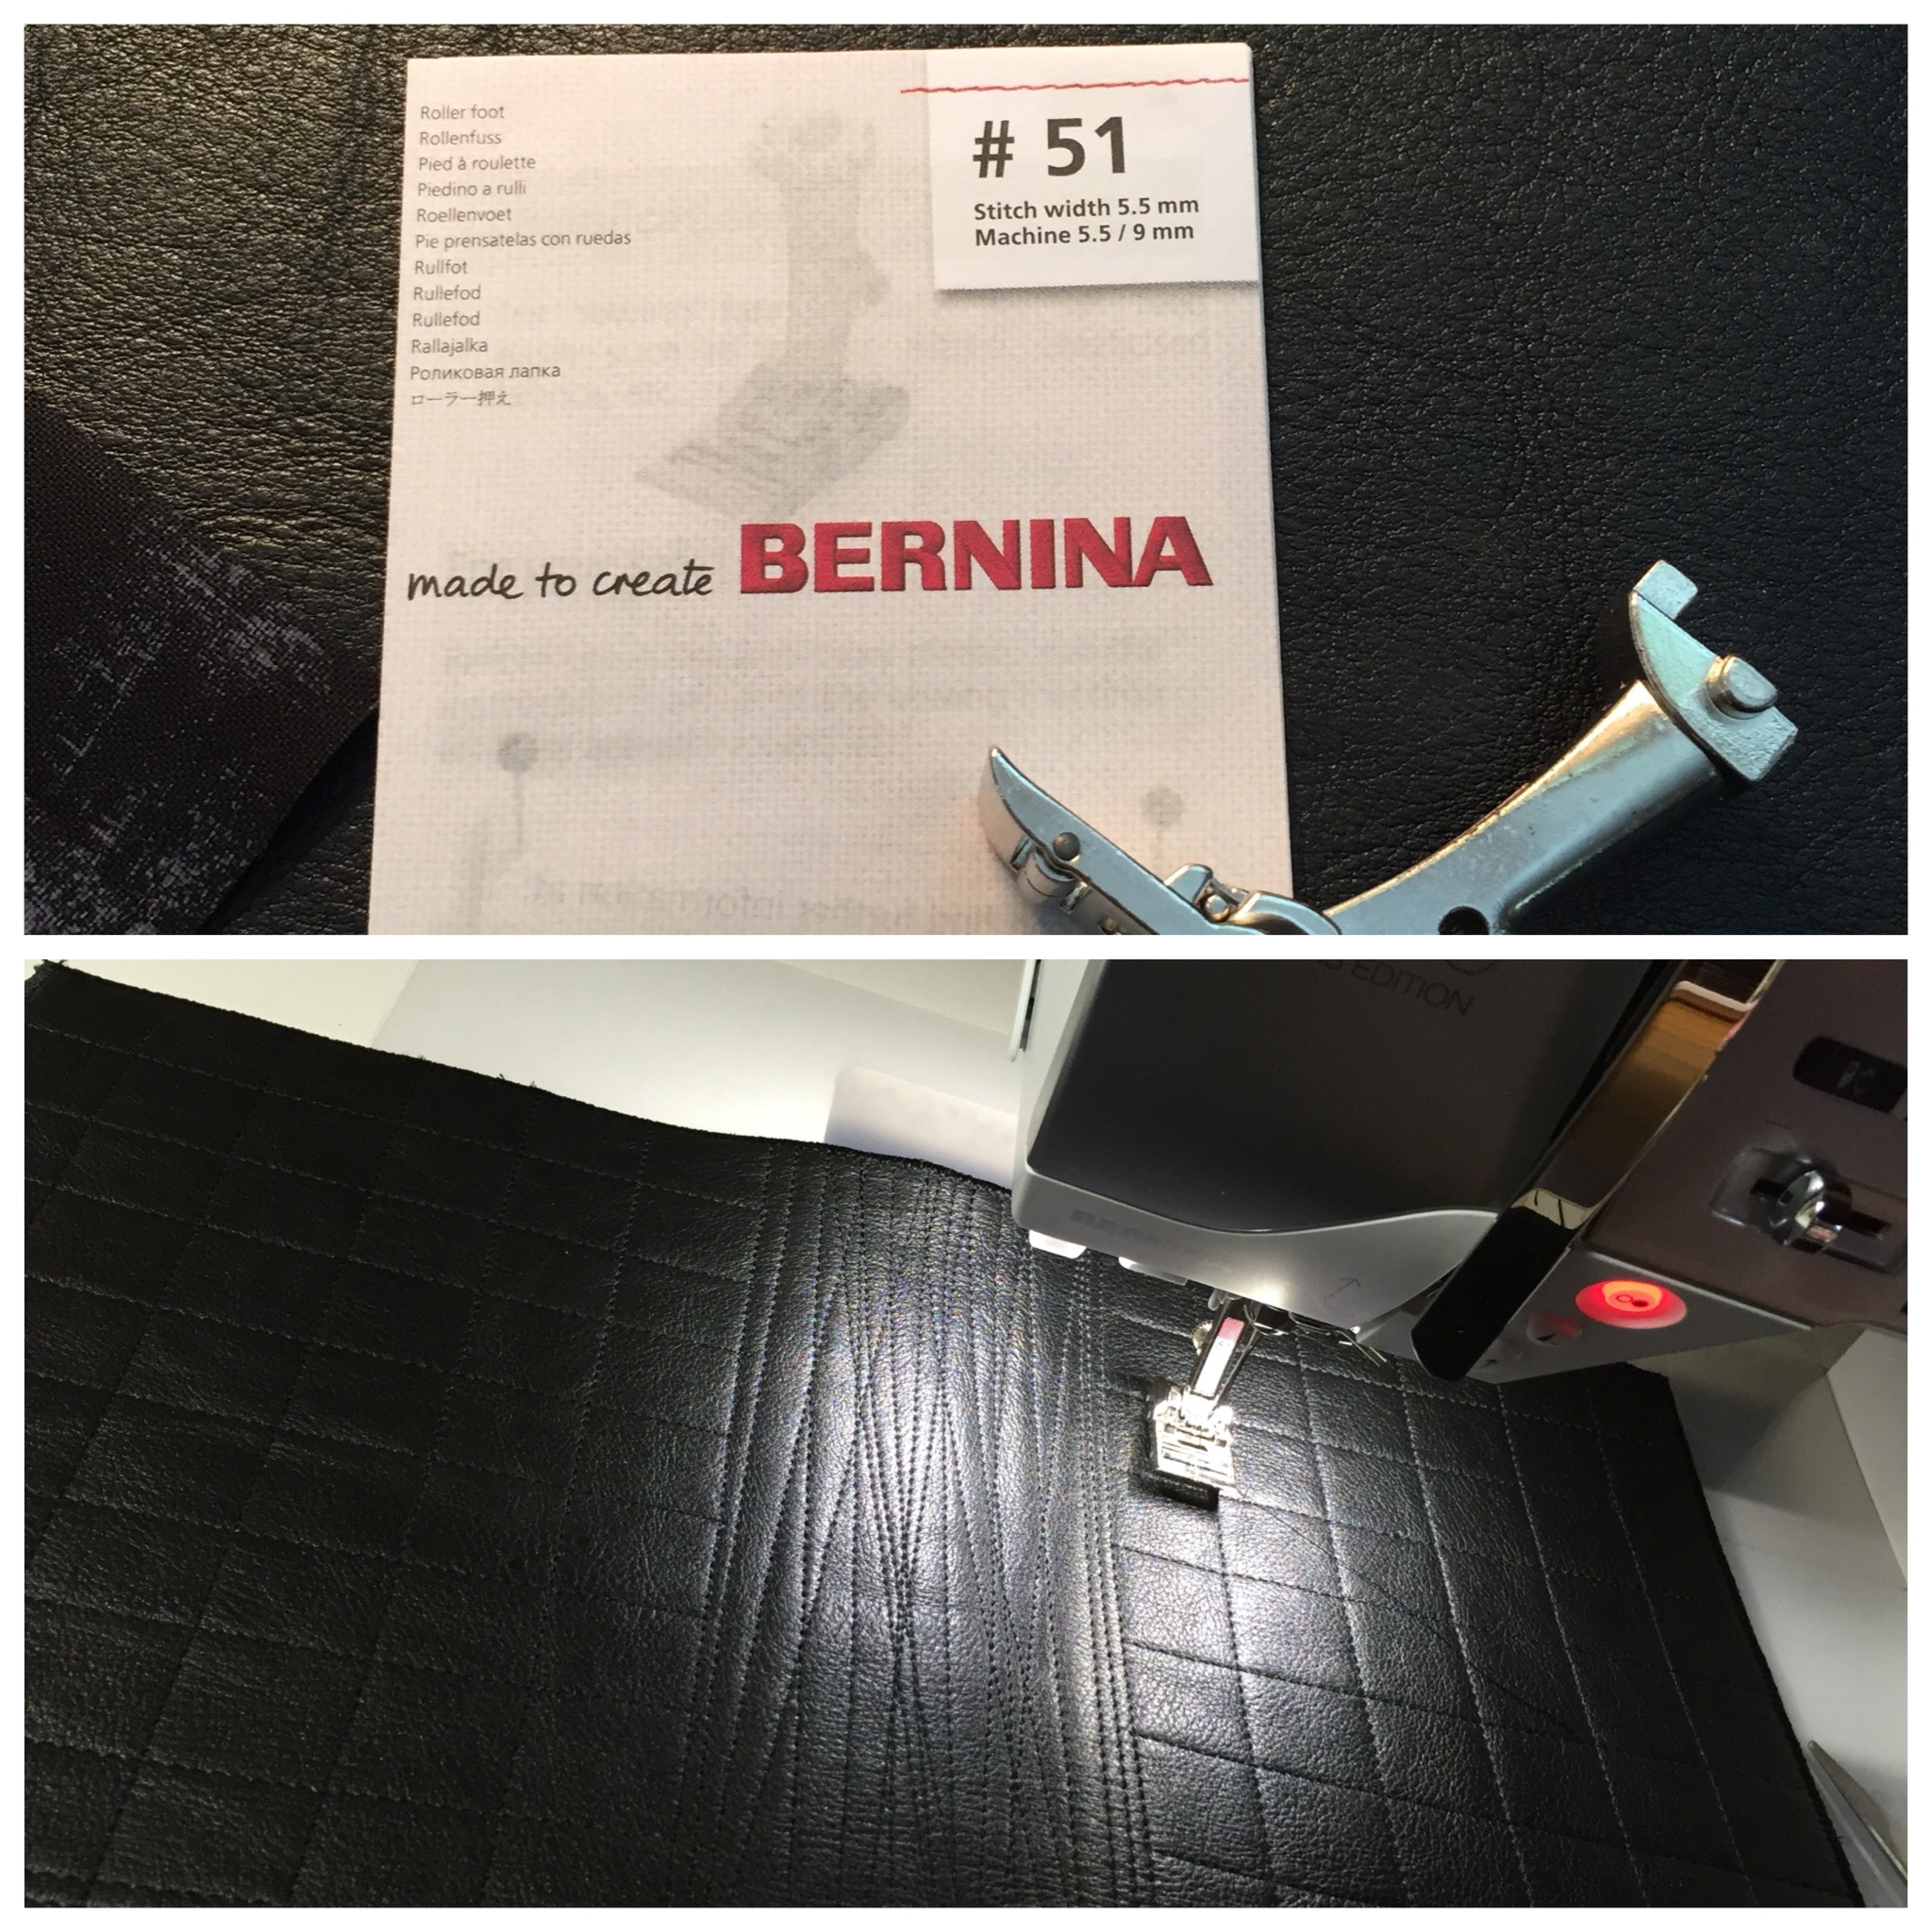
- Optional but fun– a rolling presser foot so that the leather doesn’t create drag as you stitch
- A piece of backing fabric, with enough to also create pockets once you stitch the main body of the cover
Lay out your backing fabric on a pressing surface, then take those 2 rectangles of fusible and place them side by side, with enough space between for the spine of the book. This will require some testing as you hold the notebook and wrap the fusible and fabric around it to check for size. Once you are happy with the placement, fuse (don’t forget your pressing sheet under the fusible!). Turn over and lay out your piece of leather to match…then fuse it to the fusible (I place an extra layer of fabric between the iron and the leather).
Grab that notebook again and wrap the cover around it…decide how much to trim. Do one round of zig-zag stitching around every side before the backing fabric begins to fray.
Next, make the “pockets”…measure 2 pieces the length of the height of the cover, a width that is pleasing. Fold one long edge over and stitch to prevent fraying, then stitch to the edges of your cover…here is what it will look like when finished:
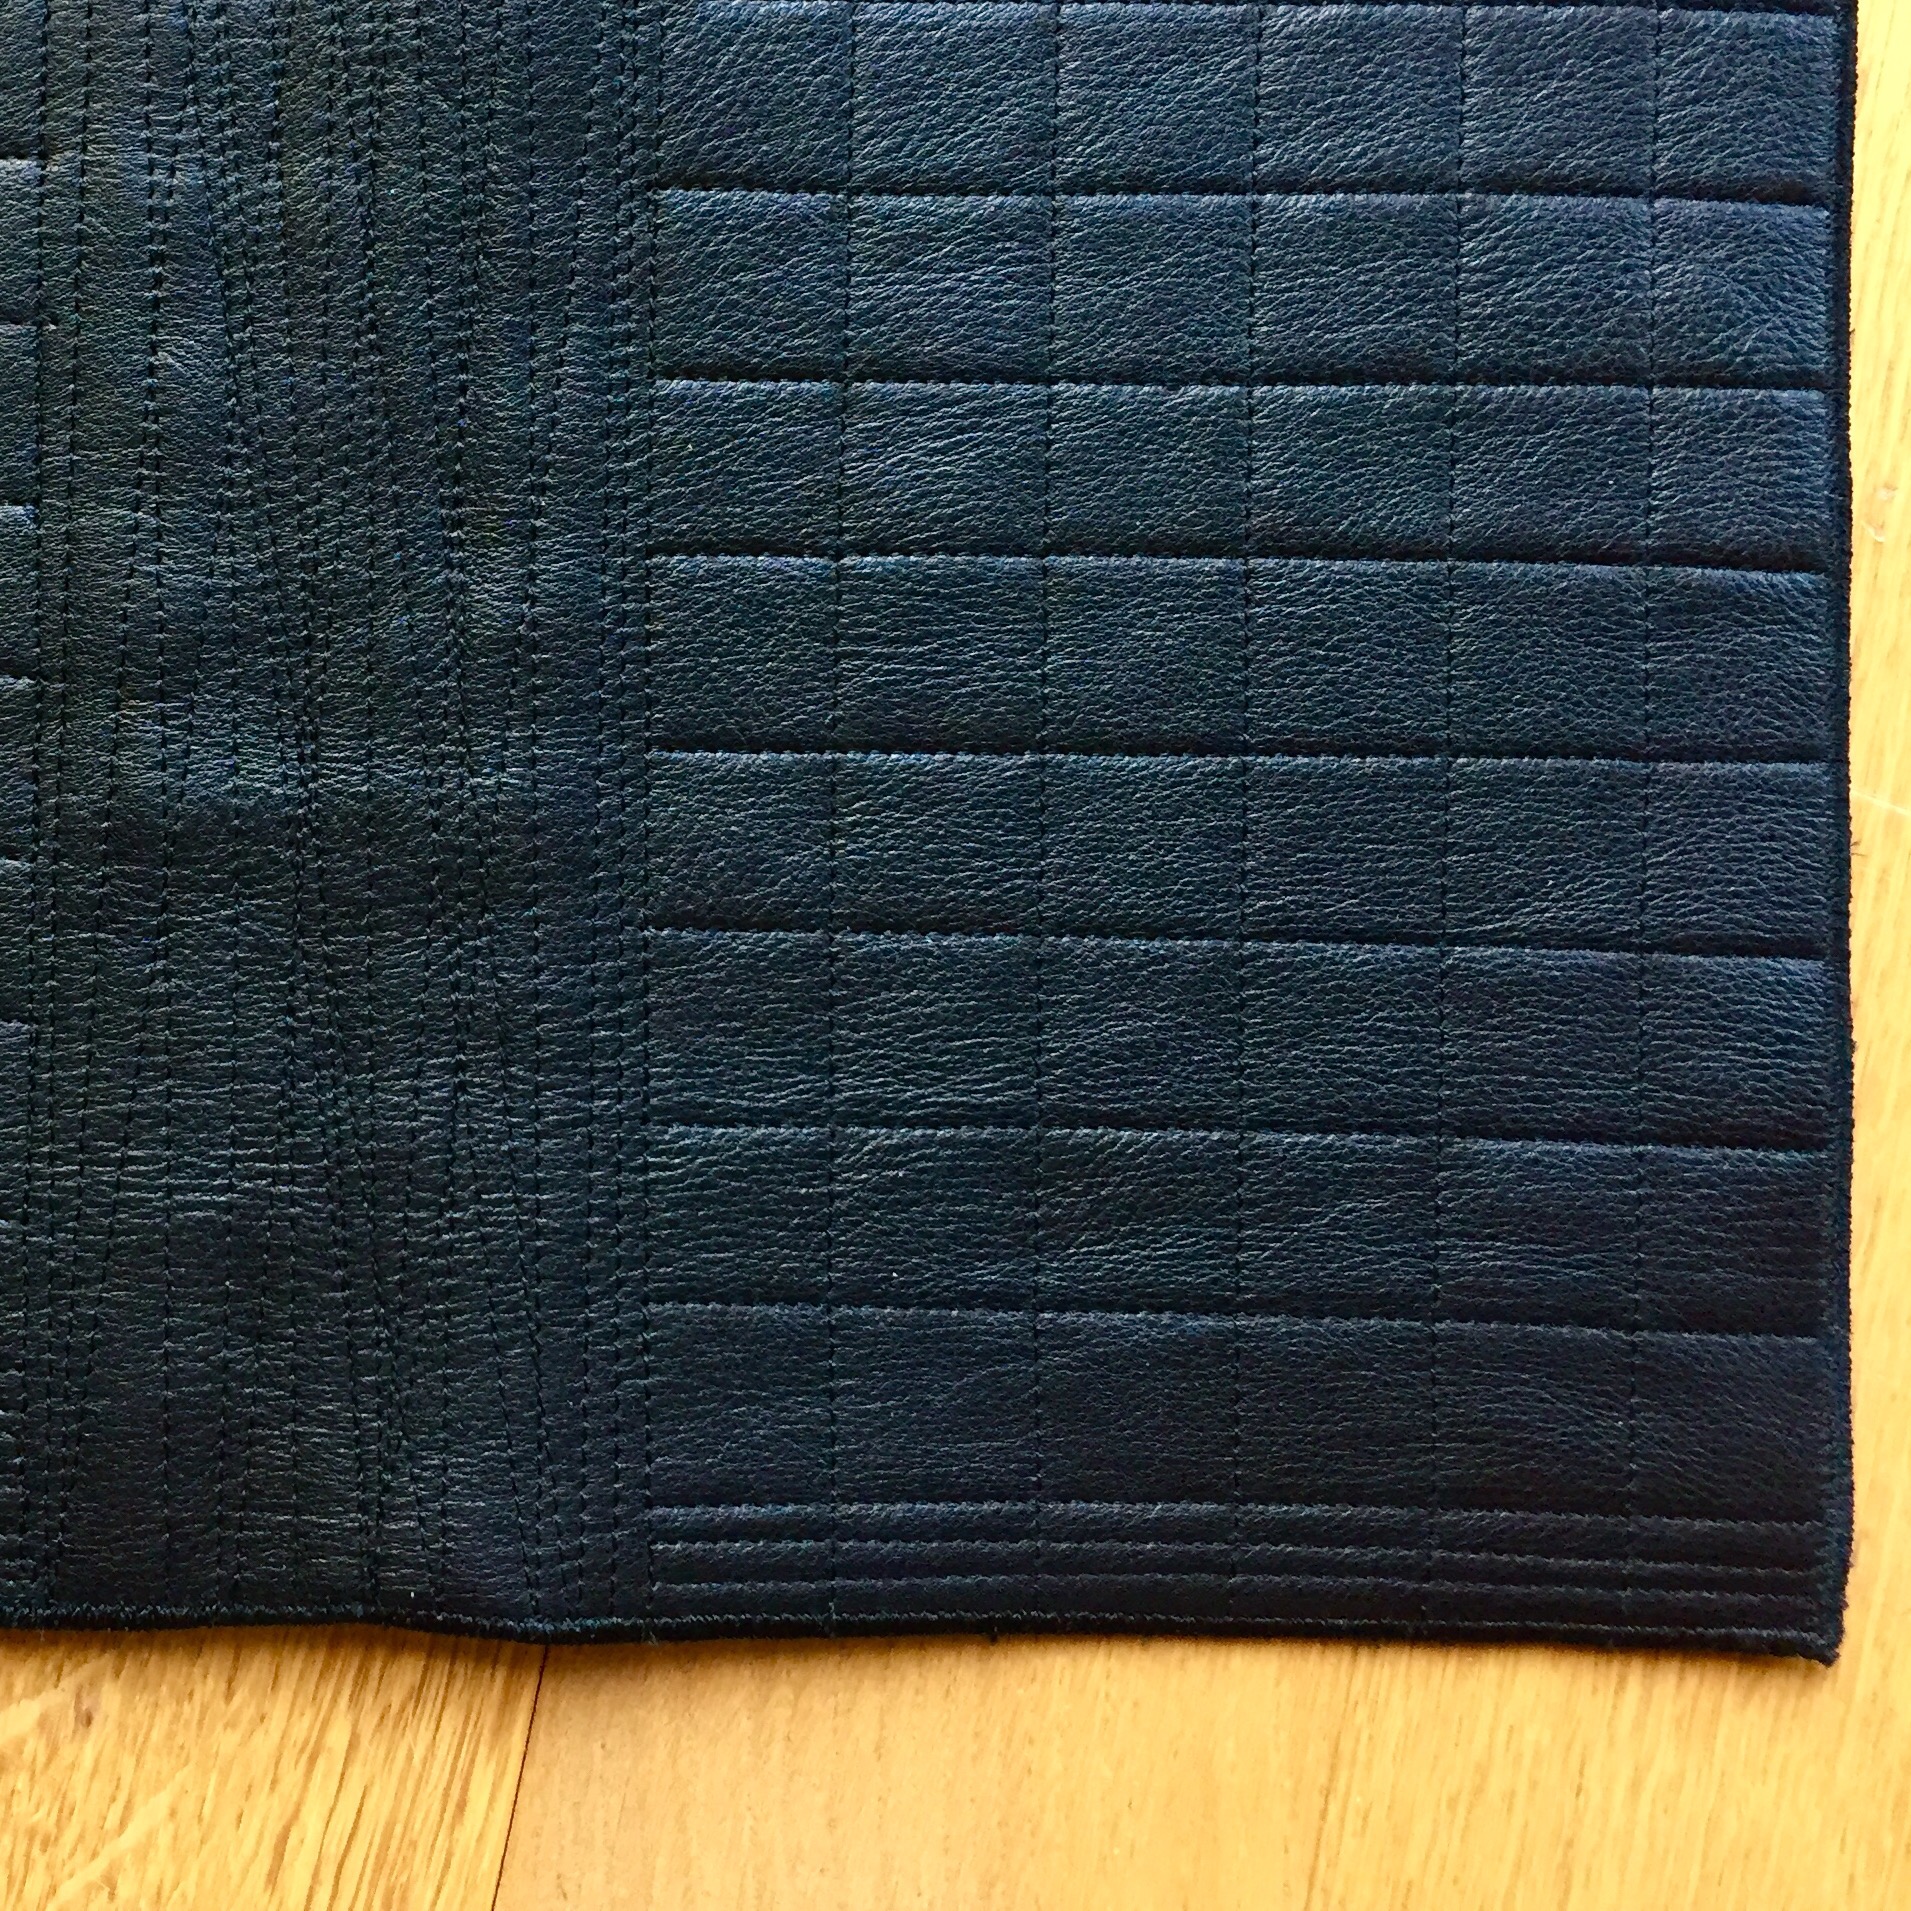
Now the fun part begins! I decided to simply quilt the fusible-stiffened covers with horizontal and vertical lines, then stitch more heavily on the spine with lots of very slightly-off lines:
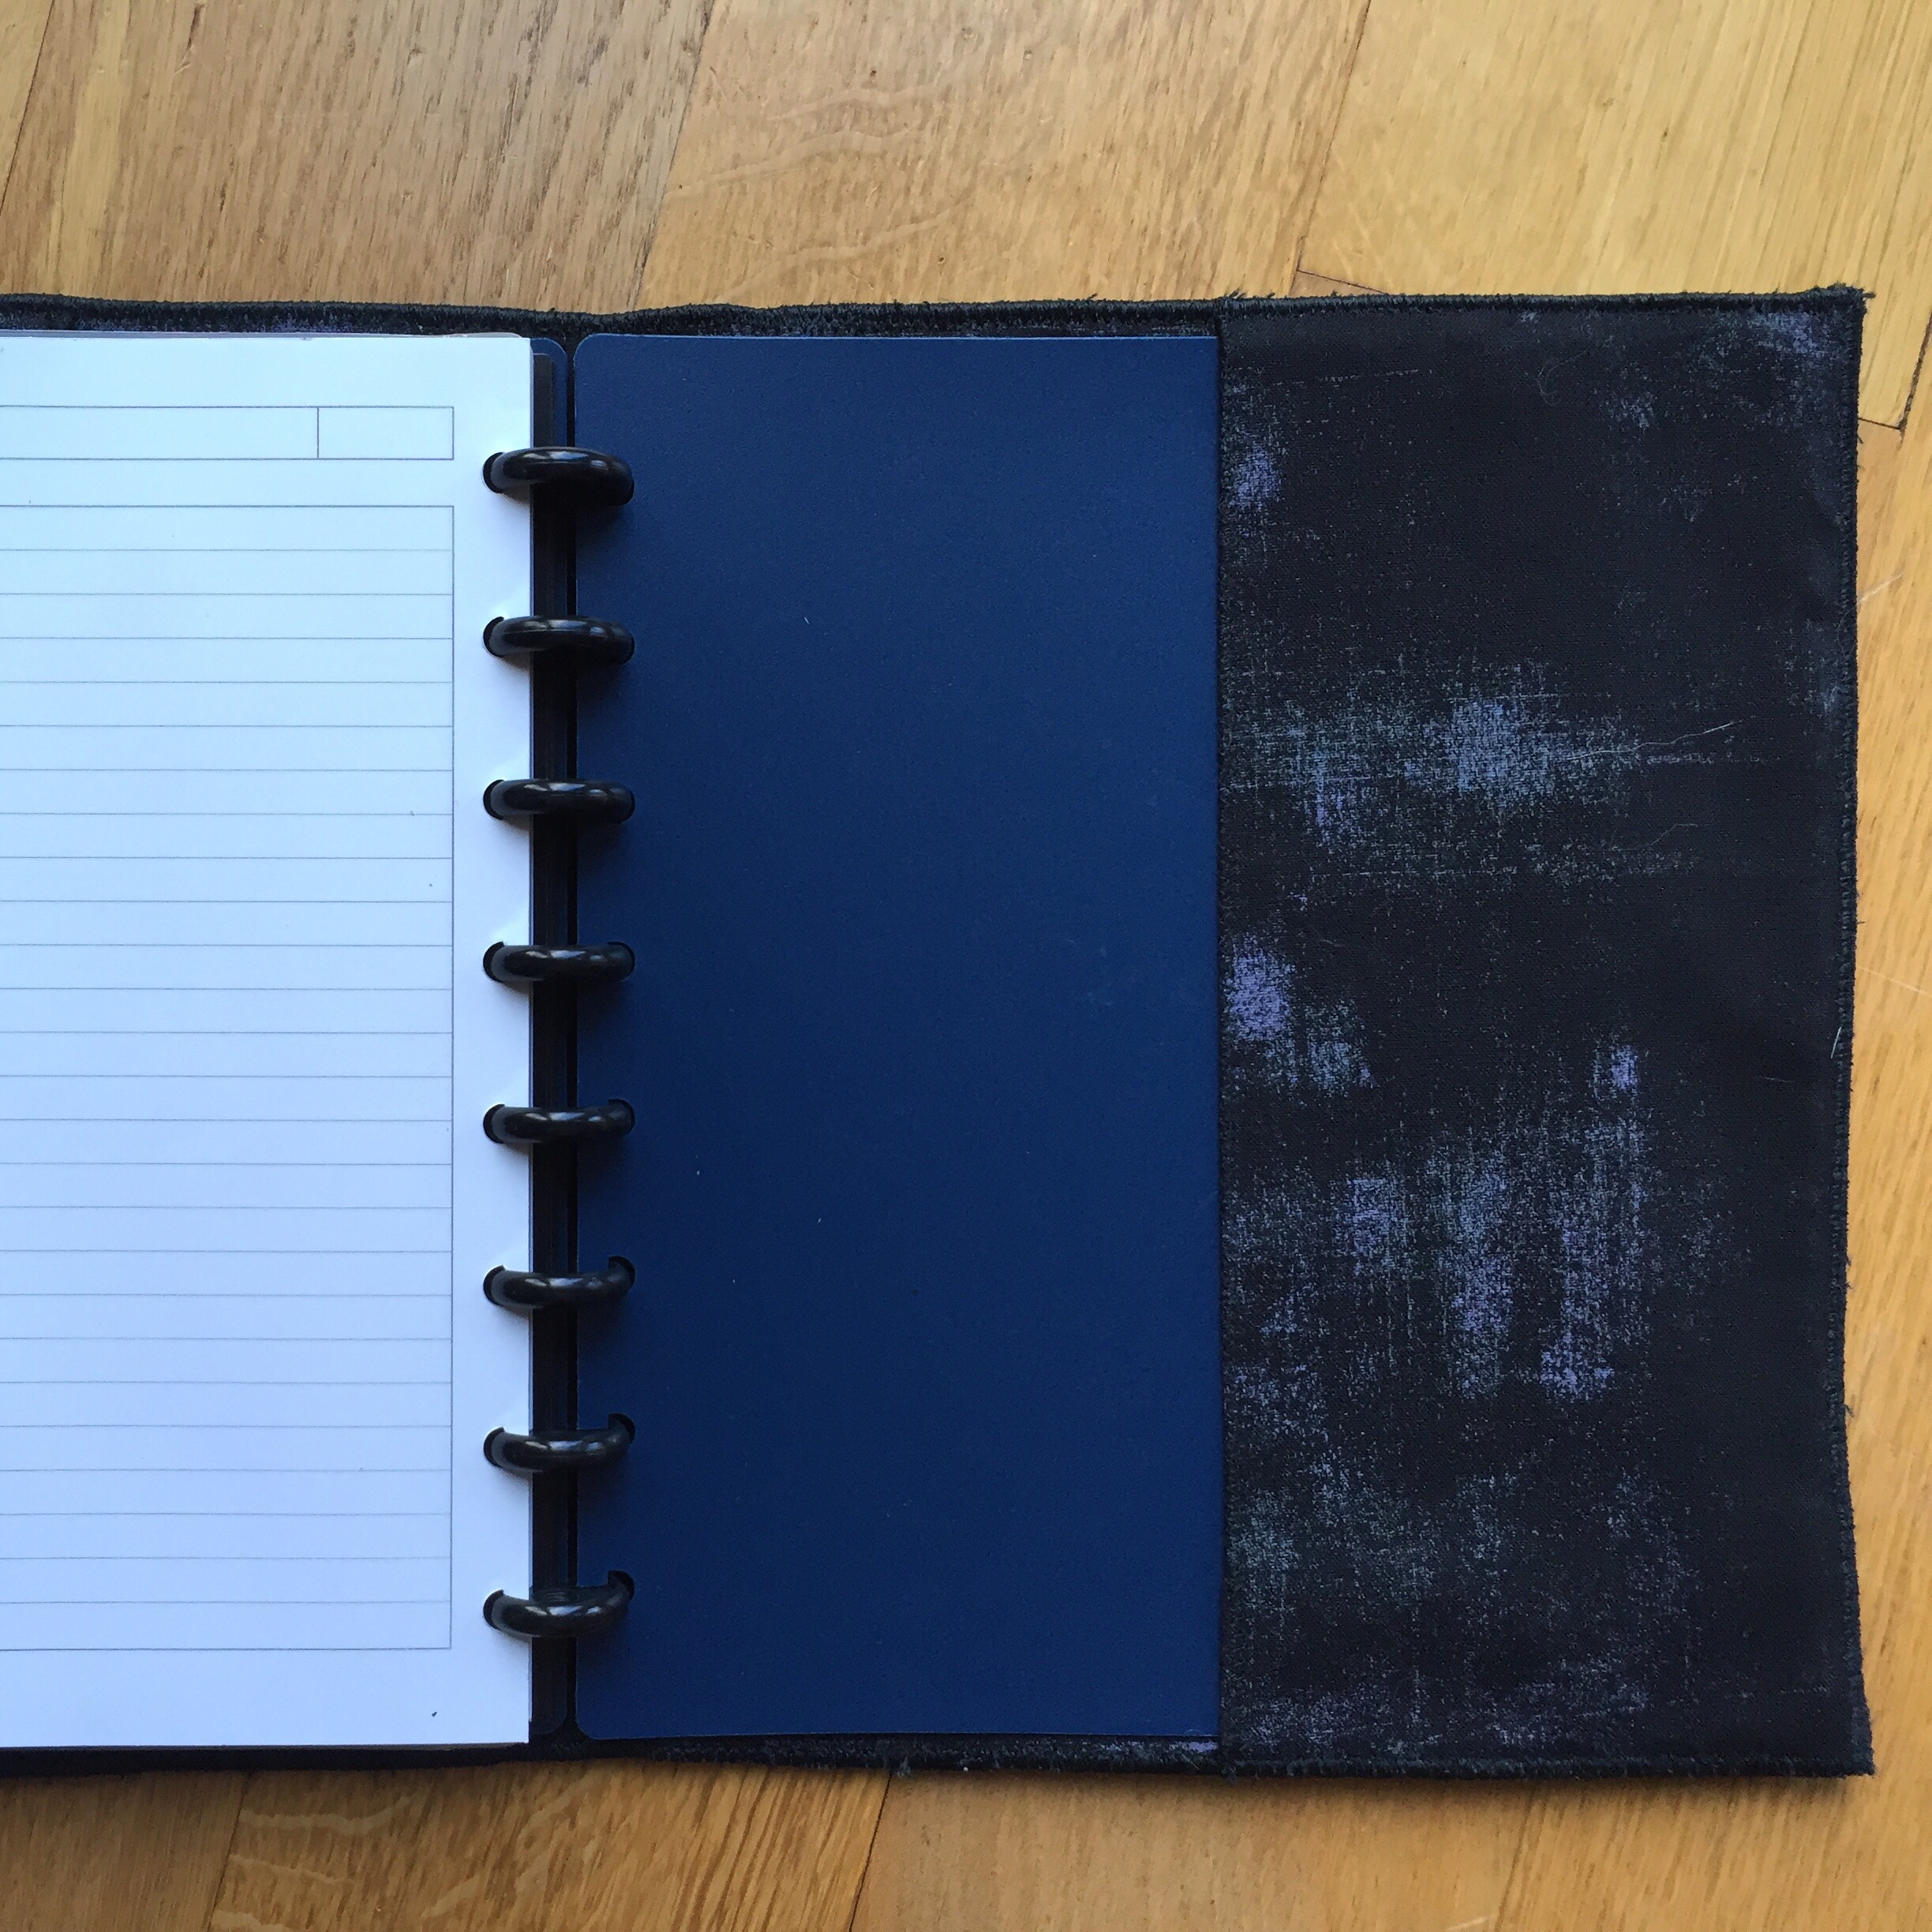
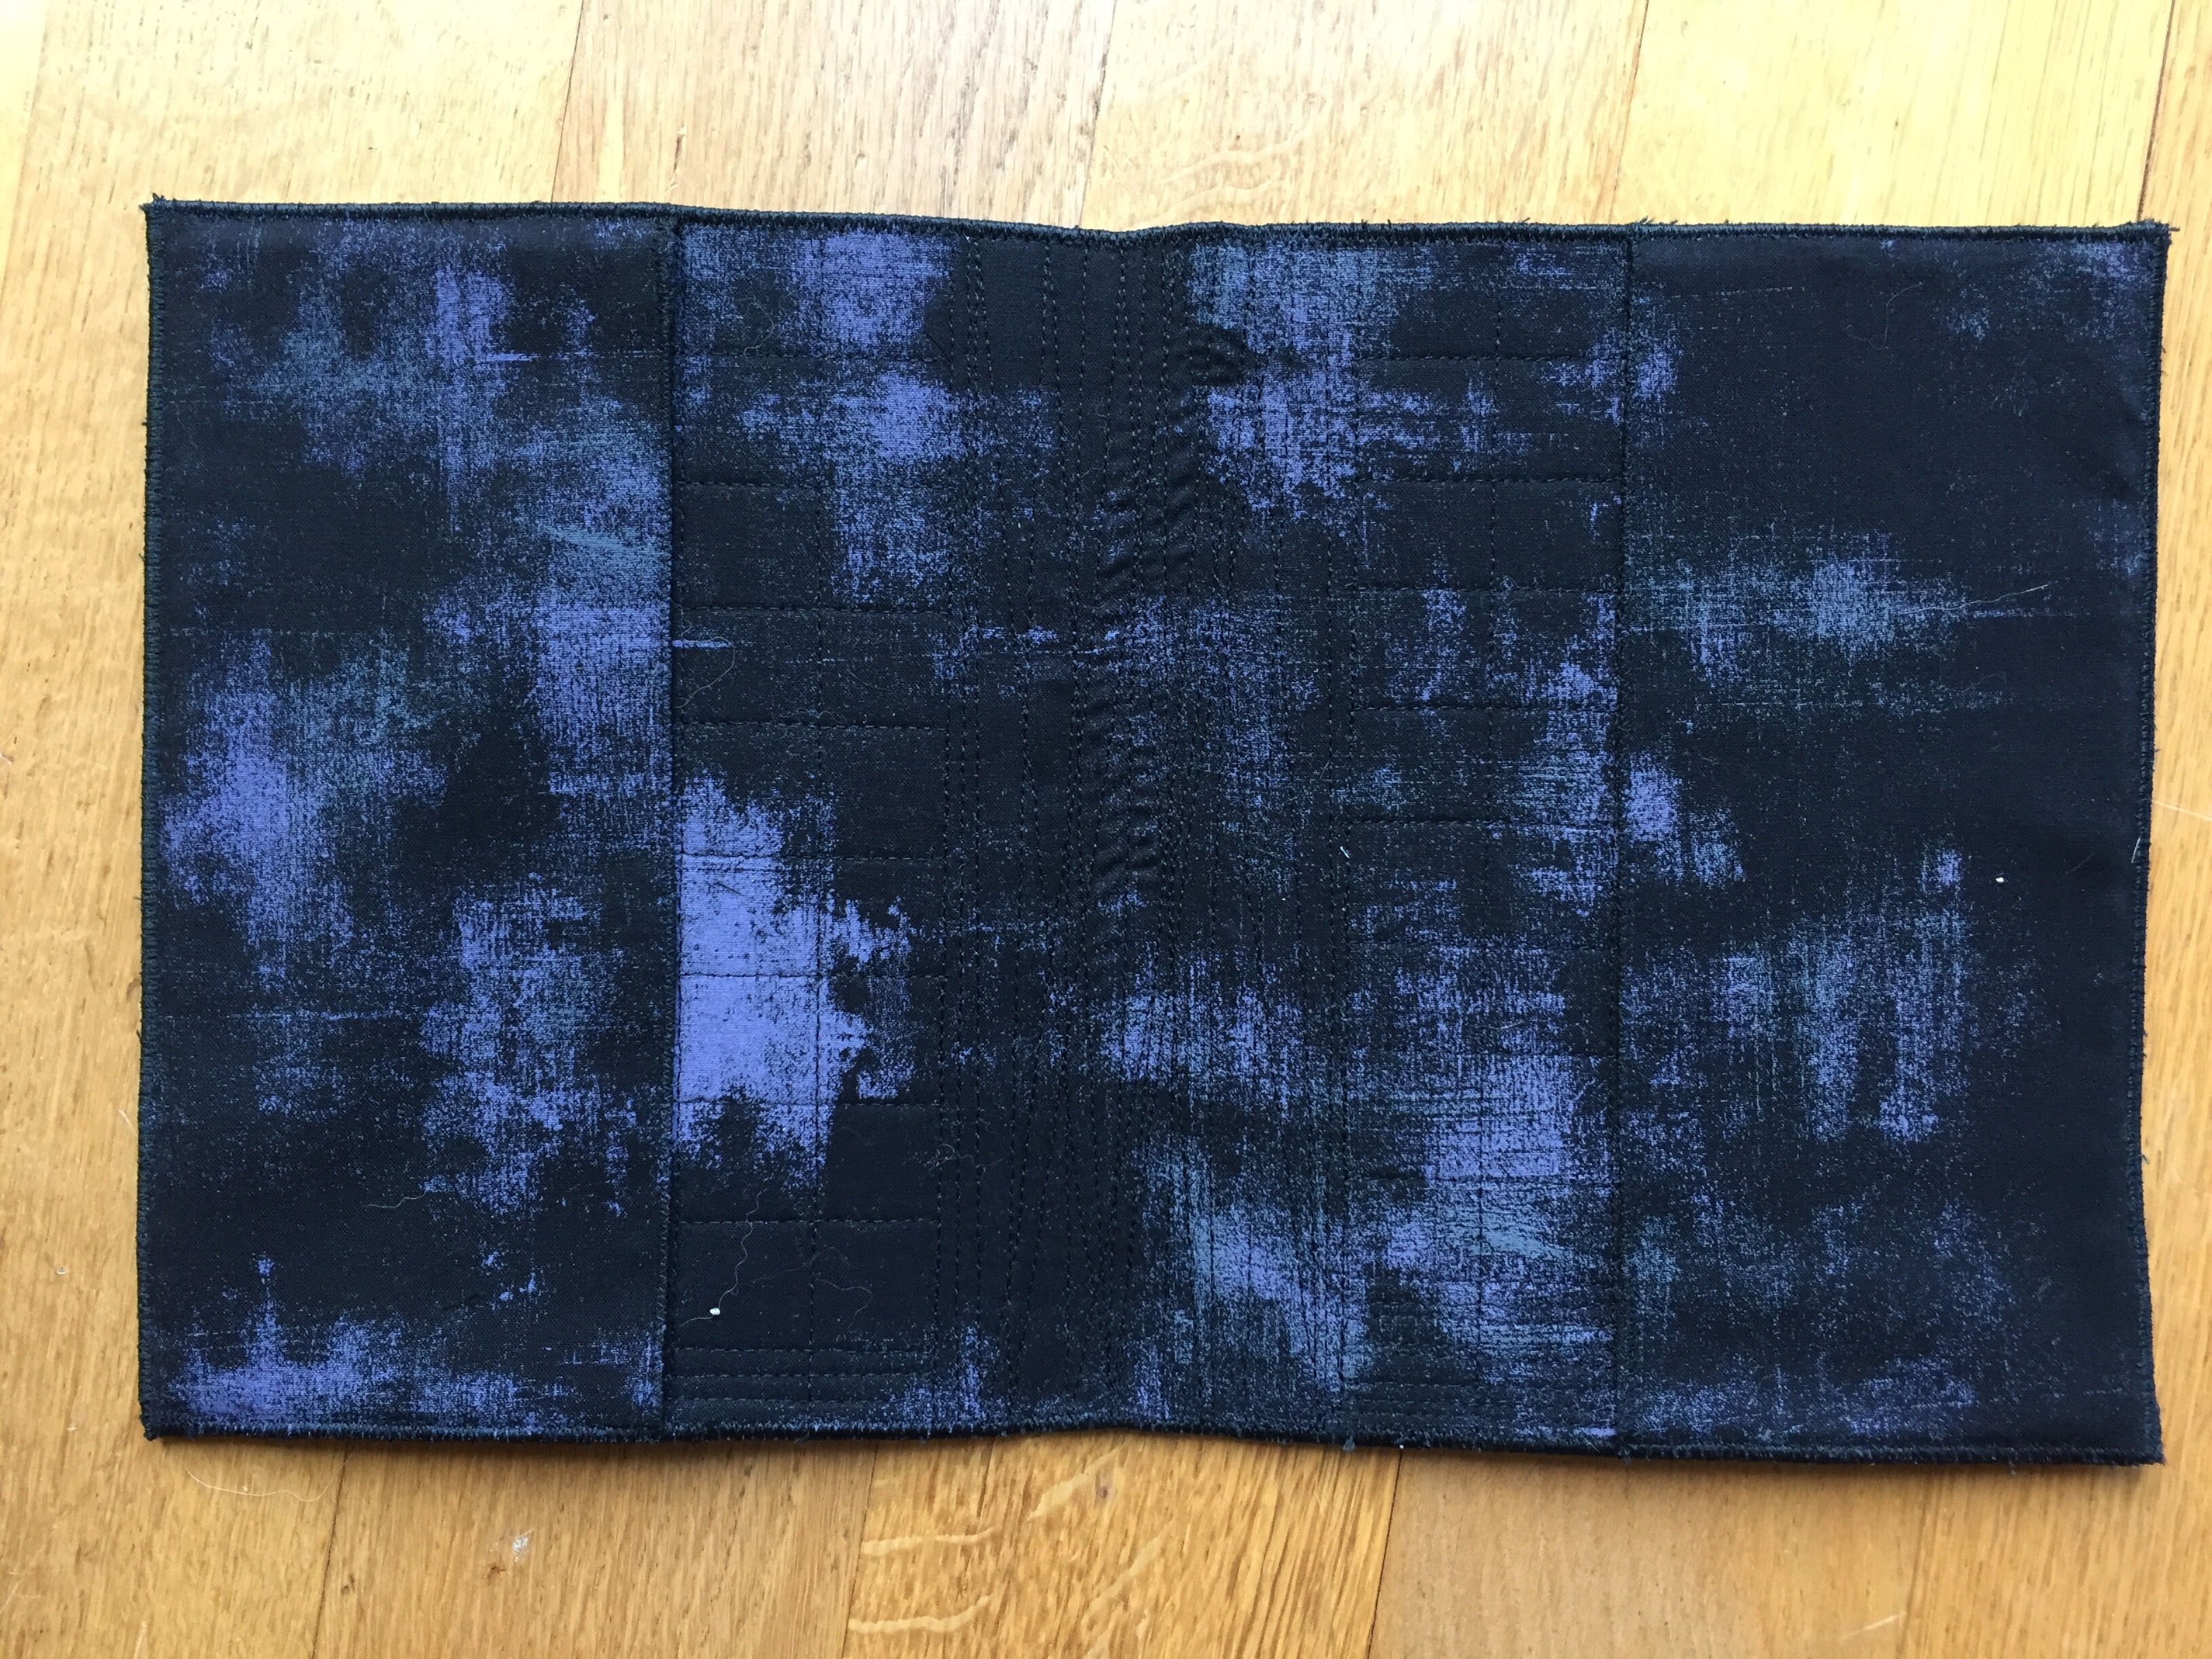
Here is what the completed cover looks like on the inside:
 I was happy I had purchased the rolling foot as it made all of the stitching a great deal easier:
A cover for a larger notebook is next on the to-do list :). Leather is really a pleasure to work with- give it a try!