


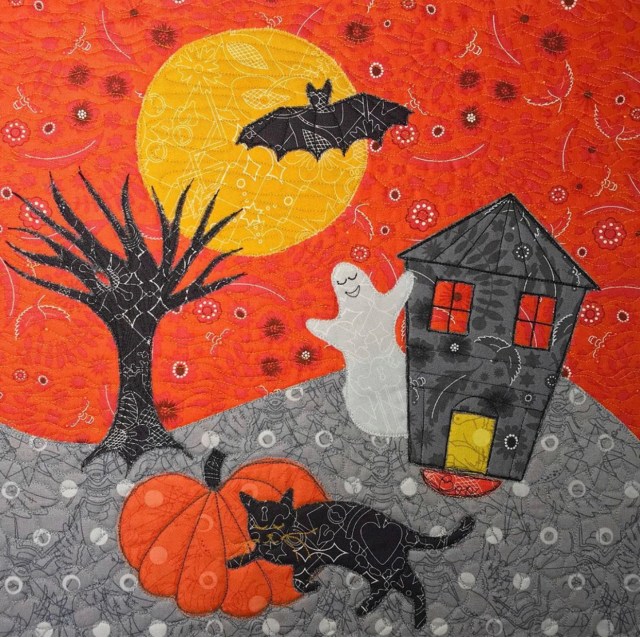
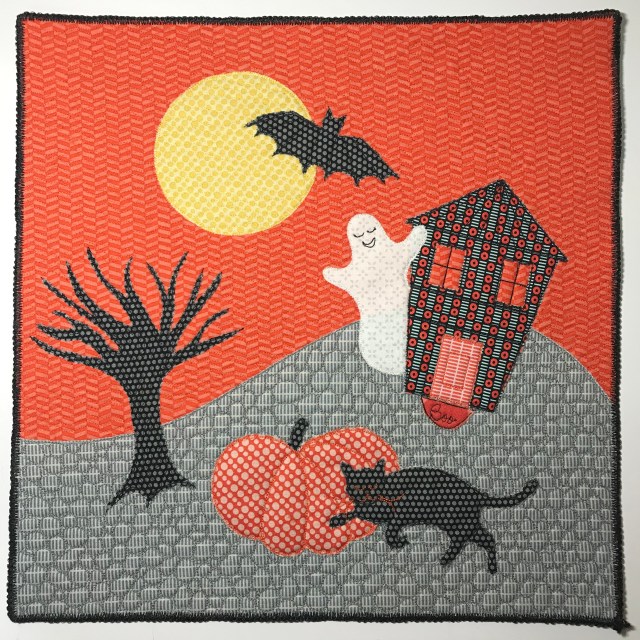
Calling all fellow Halloween fanatics! As October nears, my studio decor becomes very spooky 😉 and the candy jar holds candy corn. A few years ago, as I was making a batch of home-themed quilts for Jamie Fingal’s Heart of the Home project from a stack of Alison Glass’ Sunprints fat quarters…I couldn’t resist making one for myself for the Halloween season. This is so appropriate since the kitty that appears in all of my home quilts is my black cat, Jackson 🖤.
I created this one by free-cutting the shapes (well except for Jackson), so I reverse-engineered a pattern by tracing over the photo in Procreate, which creates a very fun video:
SUPPLIES:
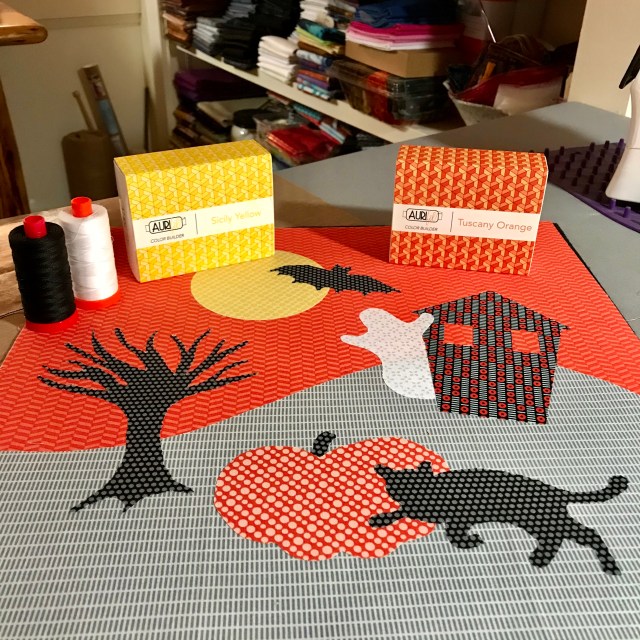
-1 fat quarter medium orange fabric
-1 fat quarter grey fabric
-large scraps of black, dark grey, yellow, light orange and white fabric
-Mistyfuse (of course ;))https://www.mistyfuse.com/
-Threads to match – I love Aurifil 50wt https://www.aurifil.com/
-15” square of backing fabric, fused, and batting
-pressing sheet such as a Goddess Sheet
-basic sewing supplies: rotary cutter and mat, sharp small scissors
-optional but really helpful for handling small pieces and helping those small scissors trim the fray: Heidi Proffetty’s awesome tweezers https://www.heidiproffetty.com/product-page/heidi-proffetty-s-precision-tweezers
- Mistyfuse all fabrics
2. Cut orange fabric to 15” by 12”
3. Cut grey fabric to 15” by 8”
4. On your cutting board, lay out your orange fabric horizontally, then overlap it with the grey fabric…the combination should take up 16” square. With your rotary cutter, cut one smooth large curve for the horizon as shown. (Why 16”? Because you want to be able to overlap the ground over the sky when you position them on the batting.) Carefully lay your “sky” on the batting, then the “ground”, and fuse your background – batting – backing sandwich.
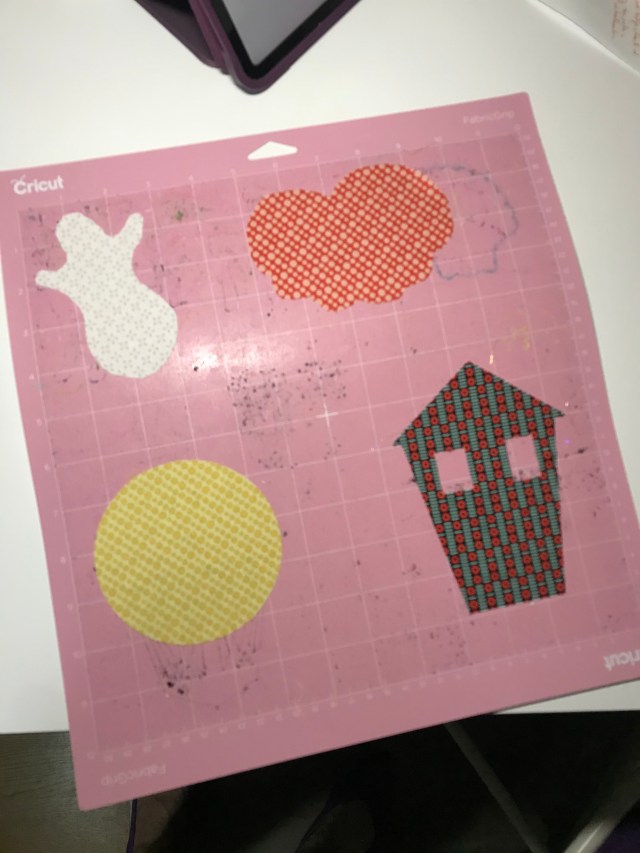
5. Trace and cut: black fabric – tree, bat, cat, pumpkin stem…yellow fabric – moon and door…white fabric-ghost…dark grey fabric – house…light orange fabric – moon. You will notice I filled the shapes in…this enabled me to cut all of them on my Cricut Maker which I adore!


6. Arrange shapes in their places and (using your pressing sheet!) fuse in place.
7. Quilt! I always stitch Jackson first, then the other small pieces, then sky, finishing with ground.
8. When you are happy with your quilting, trim to 14” square. Run a zigzag stitch around all edges (if you have a Bernina, the 2a foot is perfect for taming art quilt edges)…then, for a more finished look, widen your stitch and stitch piping or braid onto the edges. Black provides a nice frame for this composition, but have fun with whatever you have on hand!
Solids are fine for this project, but I think you can have even more fun with patterns. Here is another version I created using Janine Vangool’s Uppercase fabric collections for Windham Fabrics:
Happy Halloween!!!


You must be logged in to post a comment.